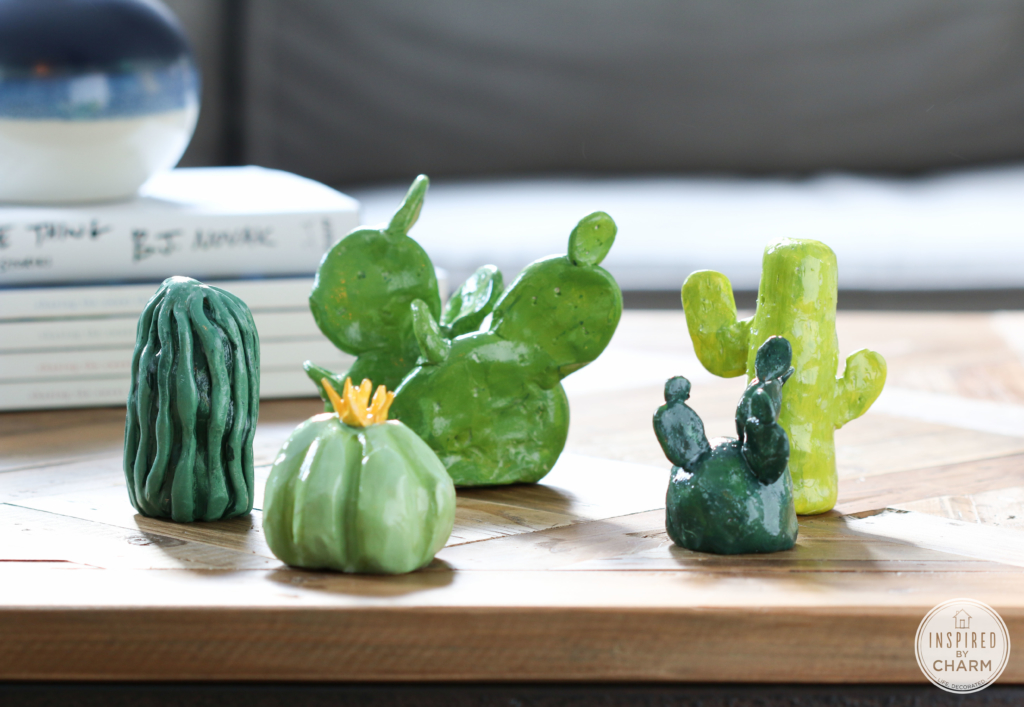
DIY Clay Cactus Garden
This Post May Contain Affiliate Links. Please Read Our Disclosure PolicyThe other day I came across these rather large ceramic cacti created by artist Lina Cofán. At first glance, I assumed they were miniatures. I thought they would be cute on a shelf or coffee table as a little decorative accessory. However, upon further investigation I realized they were actually large ceramic sculptures so they weren’t going to work as I had hoped.
That’s when I decided to make some small cacti of my own. I’s actually been wanting to do a project with clay and this was the perfect opportunity. I ended up getting 1.75 lbs of Sculpey oven-bake clay through Amazon. This was plenty (with a bit left over) to make all five of these adorable little guys.
With ready hands and a can-do attitude, I got to work on my little colorful clay garden. At first I thought I had a project fail on my hands, but once I worked with the clay a bit, things came together beautifully. I’m thrilled with how the little cacti turned out.
Let me show you how to make them and also tell you about a few lessons I learned along the way.

DIY Clay Cactus Garden
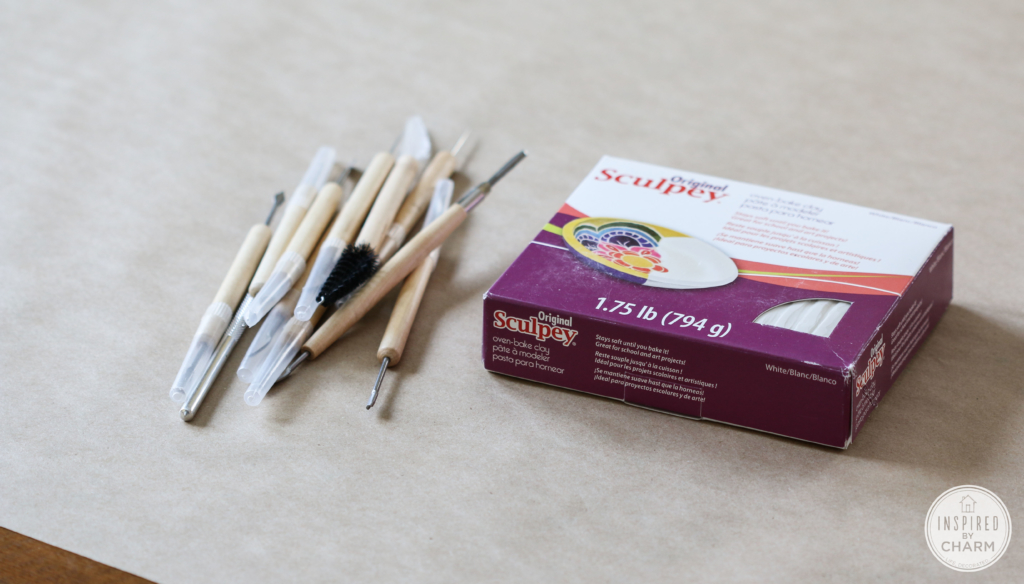
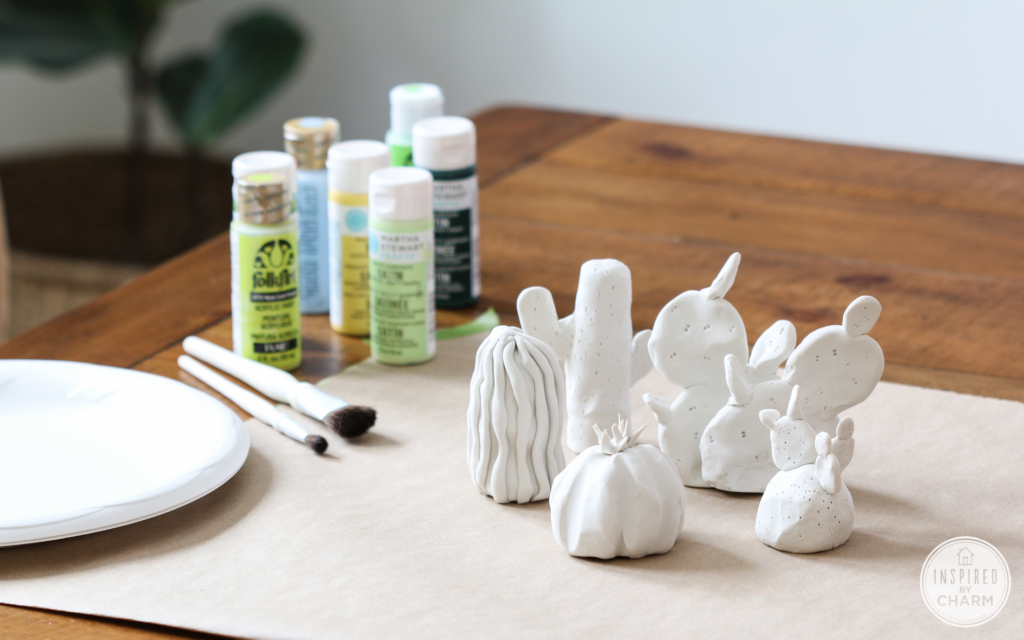
Here’s what you will need:
oven-bake clay (I used Sculpey.)
clay tools (A toothpick would also work.)
baking sheet
acrylic craft paint
paint brushes
Sculpey gloss glaze
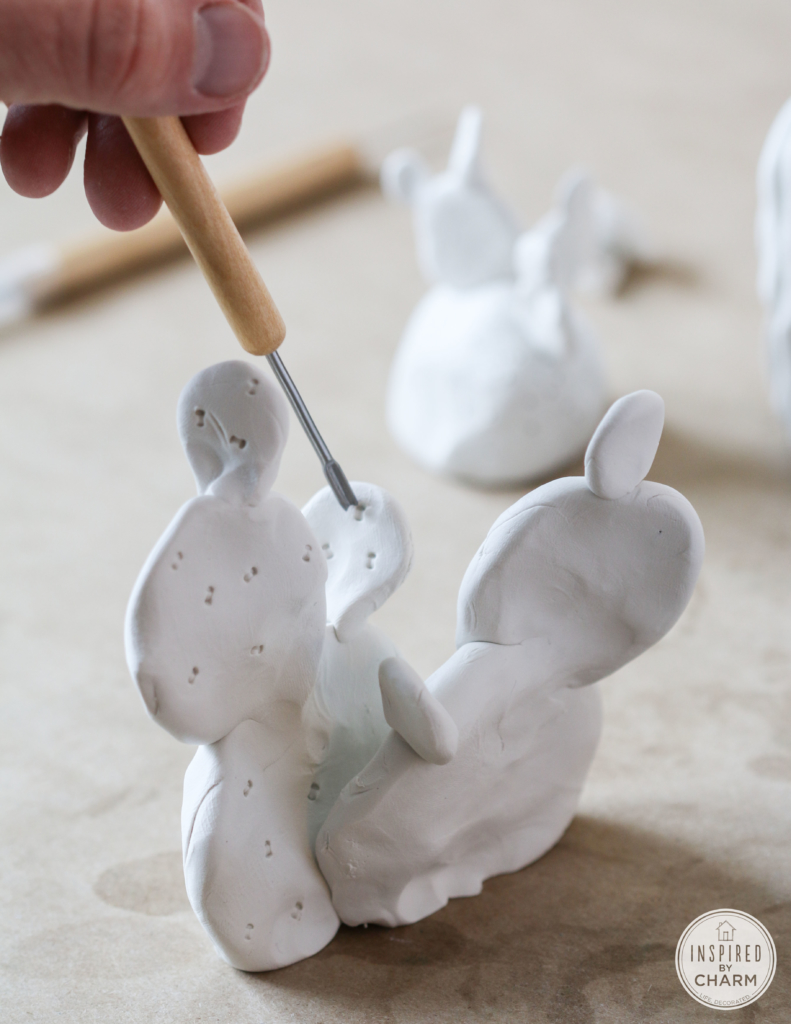
Begin by shaping your various cacti. I used some of Lina’s as well as real cacti as models and came up with a few ideas of my own. The clay may be a bit flimsy so try and keep it as thick as possible while still maintaining your design.

I did make a small hole in the bottom of some of the thicker pieces just so they would bake more quickly and I wouldn’t use up too much clay. I rolled out little snakes of clay to add texture to one cactus. For another one, I cut out a star shape to create a little flower on top.
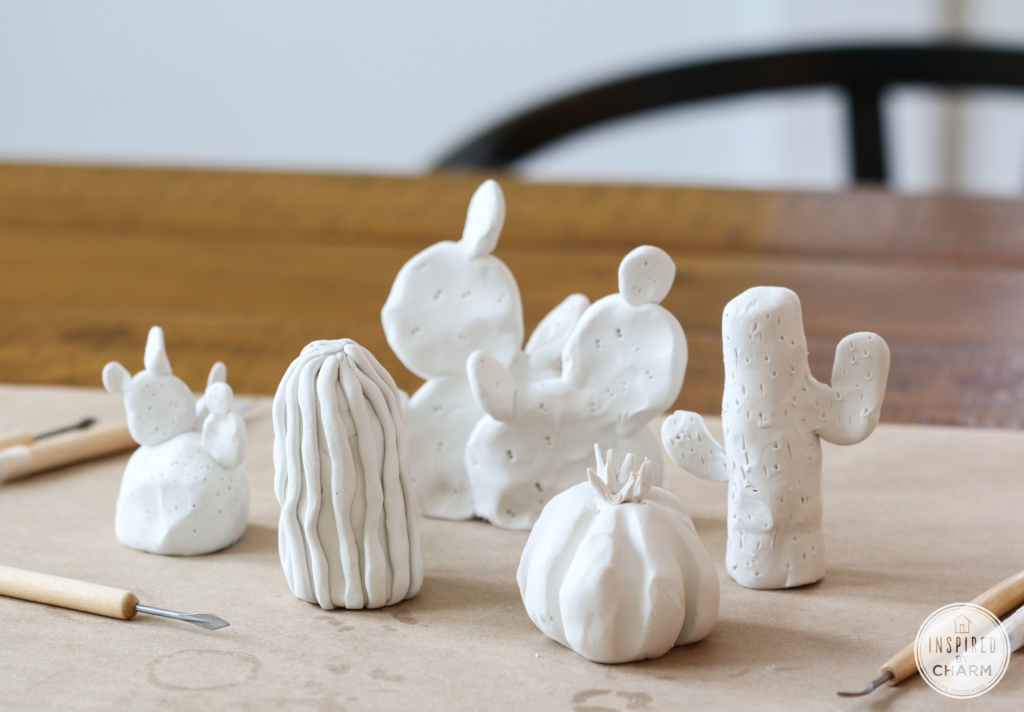
Once you’ve shaped your cacti, use the clay tools or a toothpick to add texture.
💌 SAVE THIS POST / RECIPE!
Next, your cacti are ready to bake. Follow the directions on the package. I baked mine at 275 degrees F for about 45 minutes. Check on them while they are baking to make sure they stay intact.
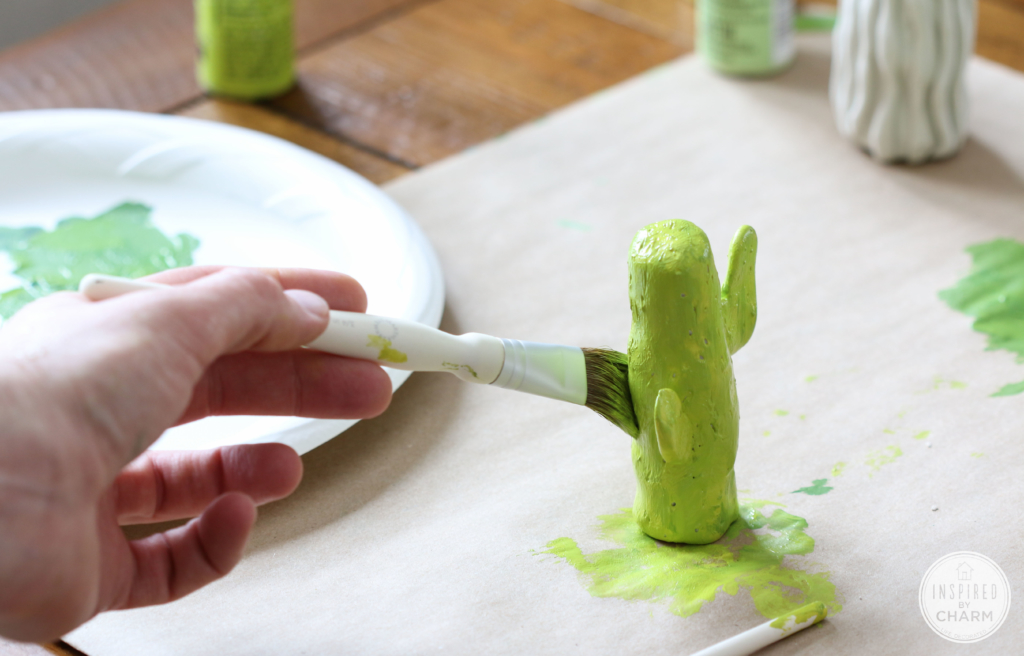
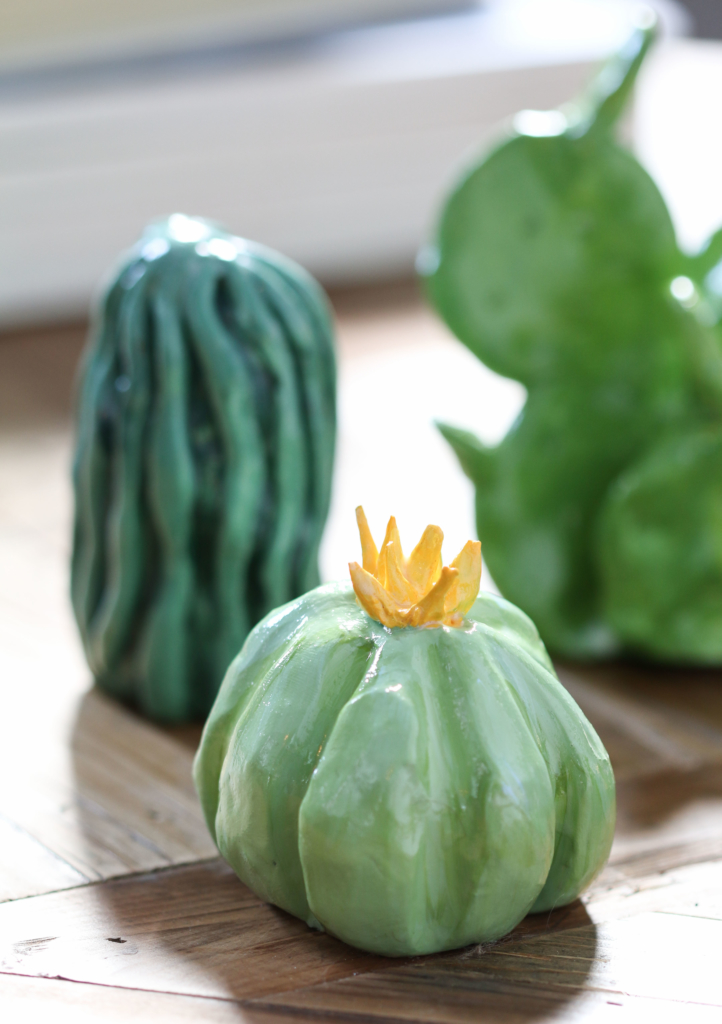
After they are baked and completely cooled, paint them whatever color you’d like. I used various shades of green. For each cactus, I used two colors just to give them a little dimension.
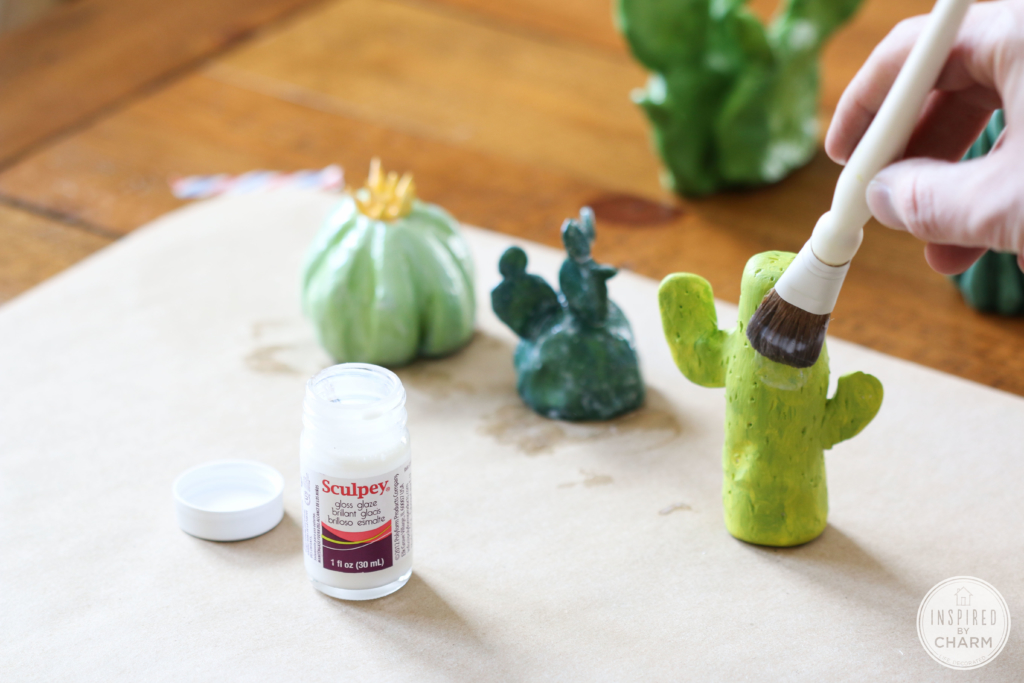
And finally, to give your cactus a glossy ceramic look, apply two coats of gloss glaze, allowing it to dry in-between coats.
Finito! Your adorable little cacti garden is complete.
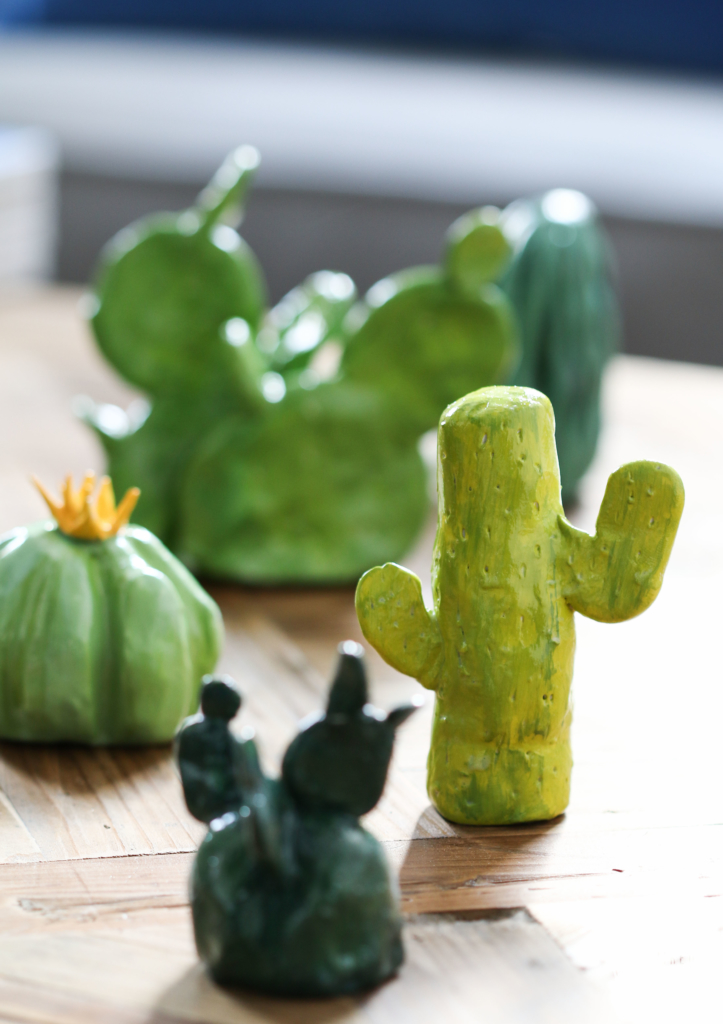
Tell me, aren’t they freakin’ adorable!? They will be such a unique accessory for a bookshelf or on a coffee table. These could also make a wonderful table setting decoration or a favor for a party. What do you think?
I think mine will eventually find a home in my office / living room space. I’m just in love with them.
Anyway, that’s it for today. I hope you enjoyed this little project. Join me back here tomorrow for an extra special post! You don’t want to miss it. I promise.

This is awesome! Thank you for sharing!
Sculpey is the best clay ever! So soft and easy to handle. I make dolls (odd ones) with the same sort of clay but I almost forgot to use it for other stuff. Lovely cactus projekt!
Oh my heck! Your cacti are so cute! Now you’ve got my head spinning. I want to play with clay now too!! What to make??
I love the little guy who is painted the “neon green” color … he looks like the life of that party 🙂
I once made a mug out of clay. It was butterfly themed. In my defense I was in the 10th grade. But it was still hideous and I knew it even then. But this, this looks manageable. And adorable.
They ARE freakin’ adorable! As someone who lives where there are real cactus everywhere, I’ll say that these would be much more preferable than the ones with sticky stuff all over them! Haha. These are really cute though, and I appreciate the tips for working with the Sculpey.
I haven’t played with clay since back in high school art. This looks like so much fun! Your projects are a breath of fresh air. 🙂
This is too cool, Michael. These would be perfect for my parents in Arizona. And I love the glossy glaze. Reminds me a lot of Ryan and my grandmas, they knew each other and were really into ceramics. We have a few pieces of theirs and they are my favorites.
These are adorable. I continue to be amazed by your creativity. On another note, I’m beginning to love that little bench you’re using as a coffee table until you can get a real one. I’m hoping you keep it for a while. It just looks right. And comfortable where it is.
Absolutely love them! I’ve been thinking of giving this popular clay a try as well. How delightful your creations turned out….. I’m thinking maybe some spring birds to flap away the winter in the
Pacific Northwest.
Love this project! I have a soft spot for Catui in my heart since my grandparents lived outside of Tuscon, AZ. Love the desert!
I’ve never been! I would love to visit that area of the country.
xo Michael
Your cacti are freakin’ adorable!!!!! You are a genius!!!
These are gorgeous! Never thought I would say that about cacti… 🙂
Your cacti are adorable!! Love the greens. Best of all, there’s no remembering to water them once a month:)
Hahaha! Excellent point. All the cuteness without the worry. 🙂
xo Michael
I like it
those are so cute!!