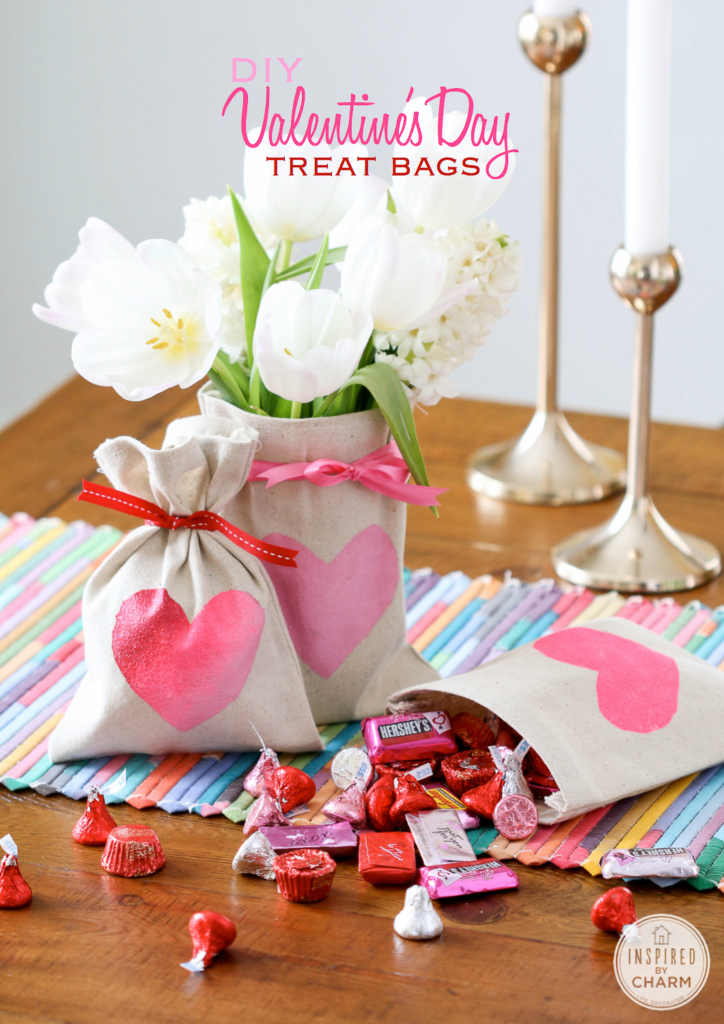
DIY Valentine’s Day Treat Bags
This Post May Contain Affiliate Links. Please Read Our Disclosure Policy
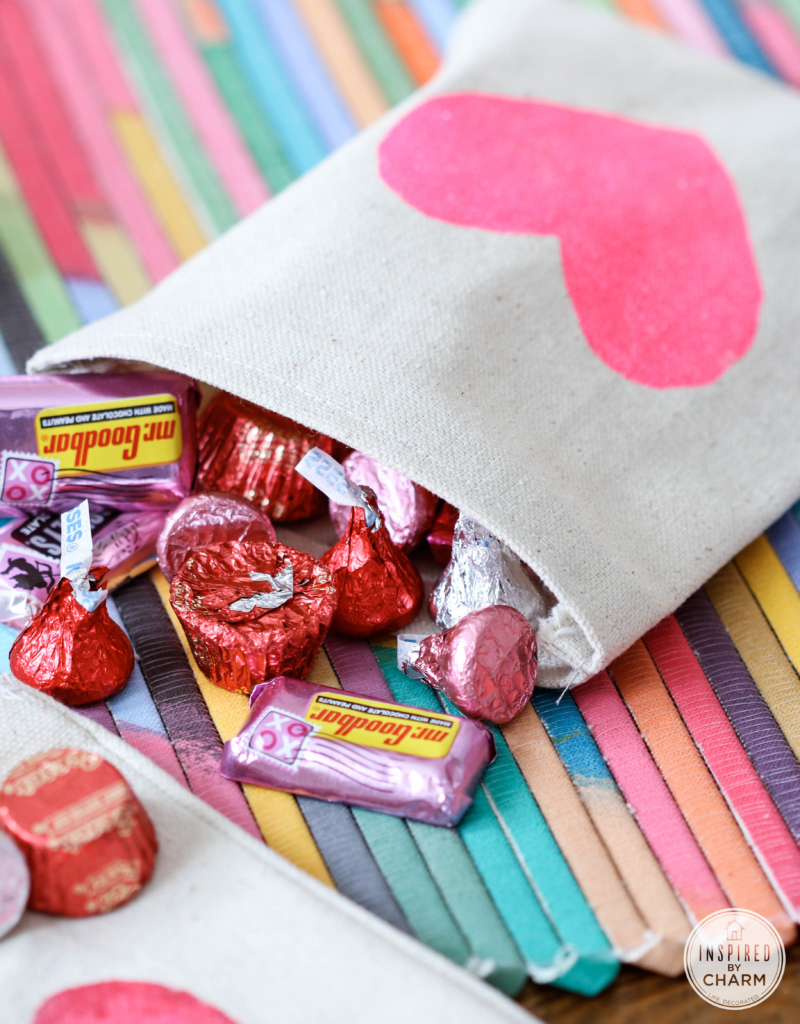
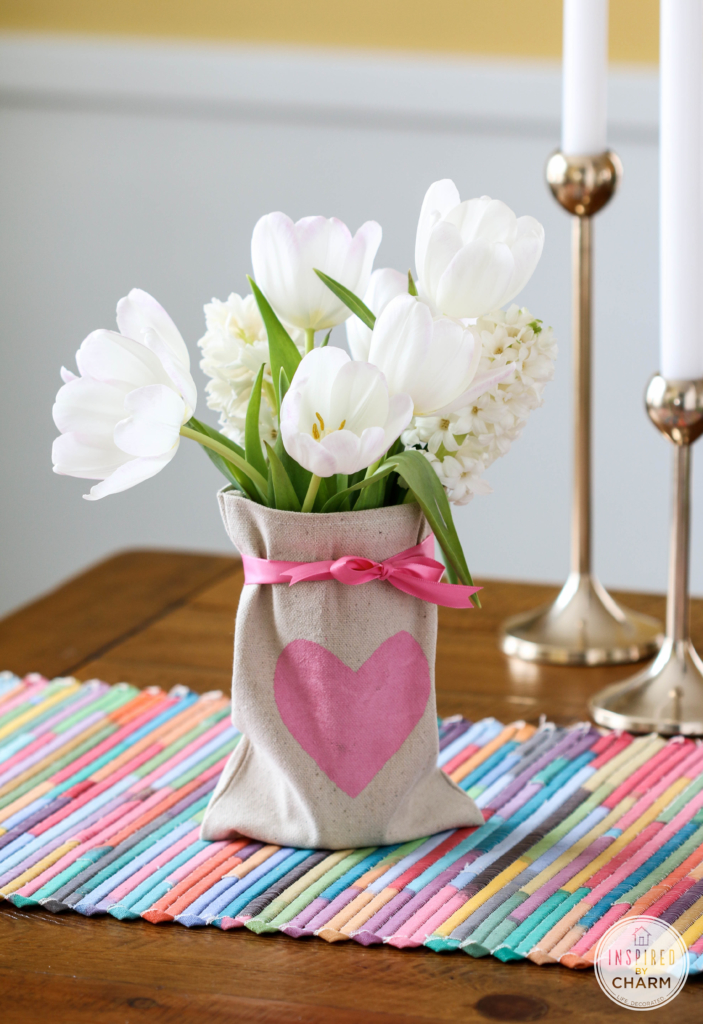
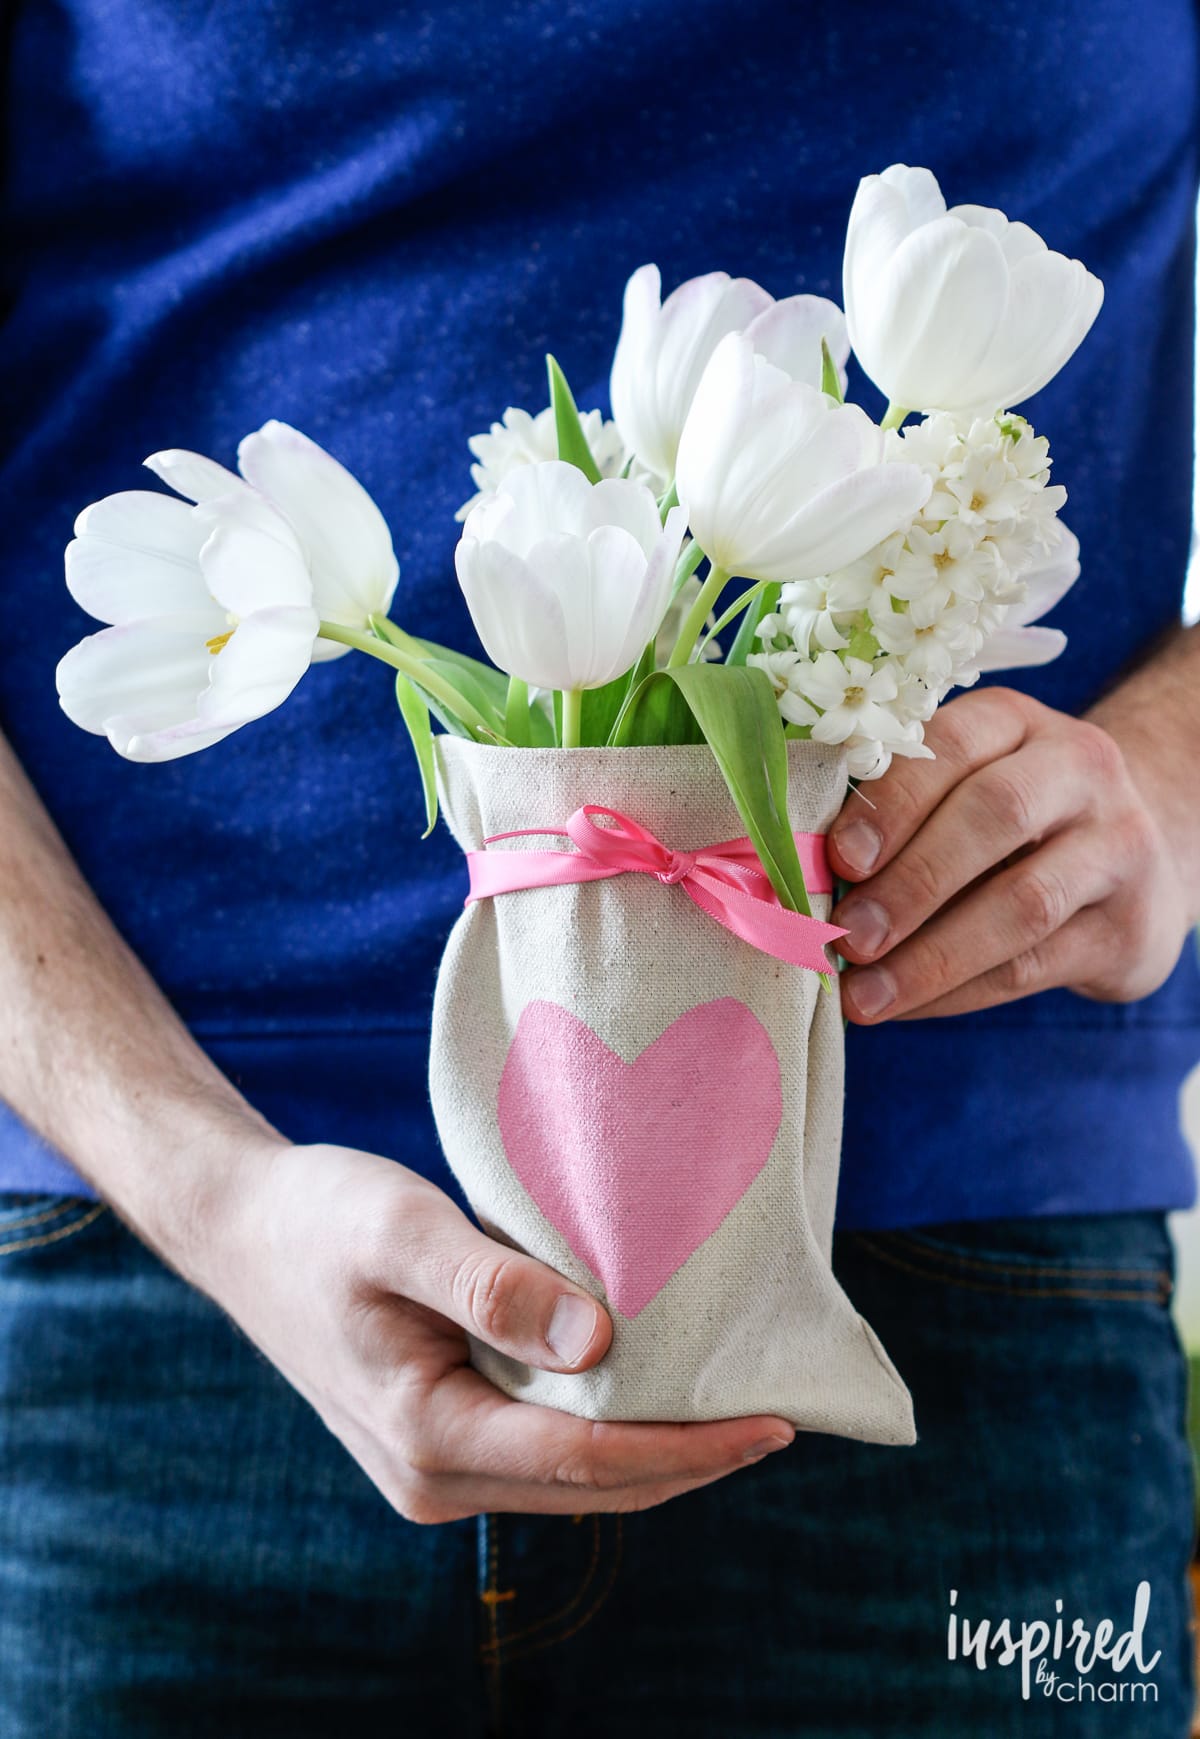
If you love handmade Valentine ideas that feel practical and creative, these DIY Valentine’s Treat Bags are a great place to start. They’re simple to sew, fun to paint, and work for so many different gift ideas. Fill them with candy, tuck them over a wine bottle, or use them to dress up a small floral arrangement.
Valentine’s Day has always felt like the perfect excuse to slow down a little and make something by hand. Not in a complicated, all-day kind of way, but in that cozy, creative moment kind of way where you’re cutting fabric, painting hearts, and letting things come together naturally. These DIY Valentine’s Treat Bags are exactly that sort of project. Simple, playful, and full of charm without asking too much of you.
Normally, I would let Valentine’s Day go by unnoticed. It’s really not my favorite holiday. This year, however, I decided to push myself to get a little bit into the holiday spirit.
In addition to sharing my Sweetie Martini and Sugar Cookies with Cotton Candy Frosting, I’m also going to show you how to make a fun and useful craft.
What I love most is how approachable this project feels. You don’t need fancy tools or a lot of experience to make something really special. Whether you’re putting together a small gift for someone you love, dressing up a bottle of wine, or adding a sweet handmade touch to your home, these bags are meant to be fun from start to finish. I’m so excited to show you how easy it is to make them and how many ways you can use them once you do.
Let’s get into all the details and steps you’ll need to make these adorable treat bags.

Why You’ll Love This Project
- It’s simple at its core, but leaves plenty of room to make it your own. Once the basic bag is sewn, you can keep things minimal or layer on as much personality as you’d like with paint, ribbon, and personal details.
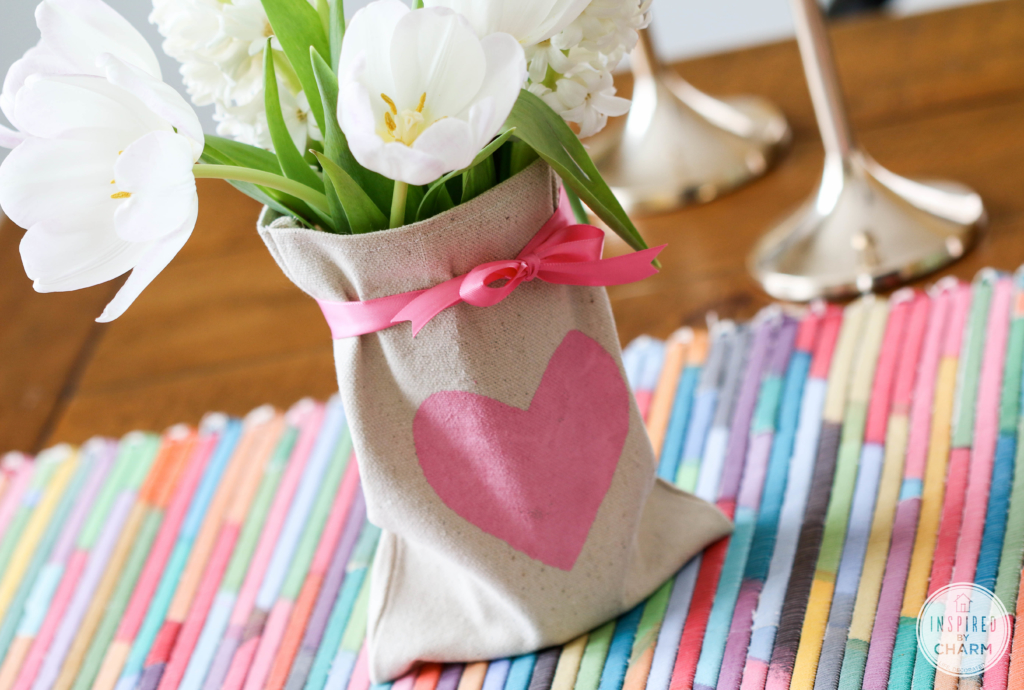
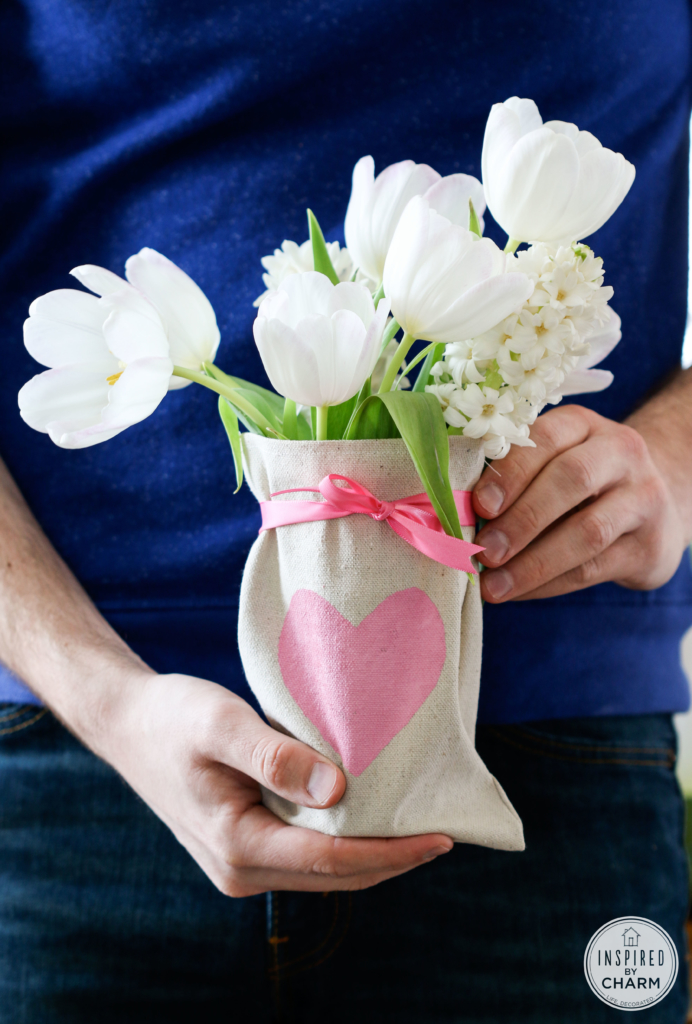
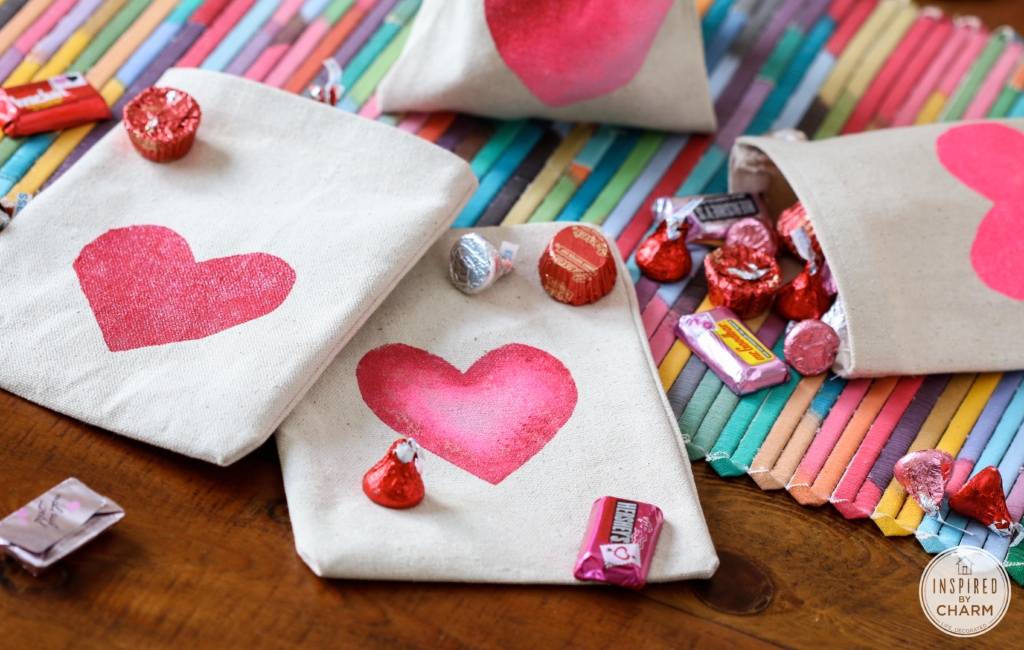
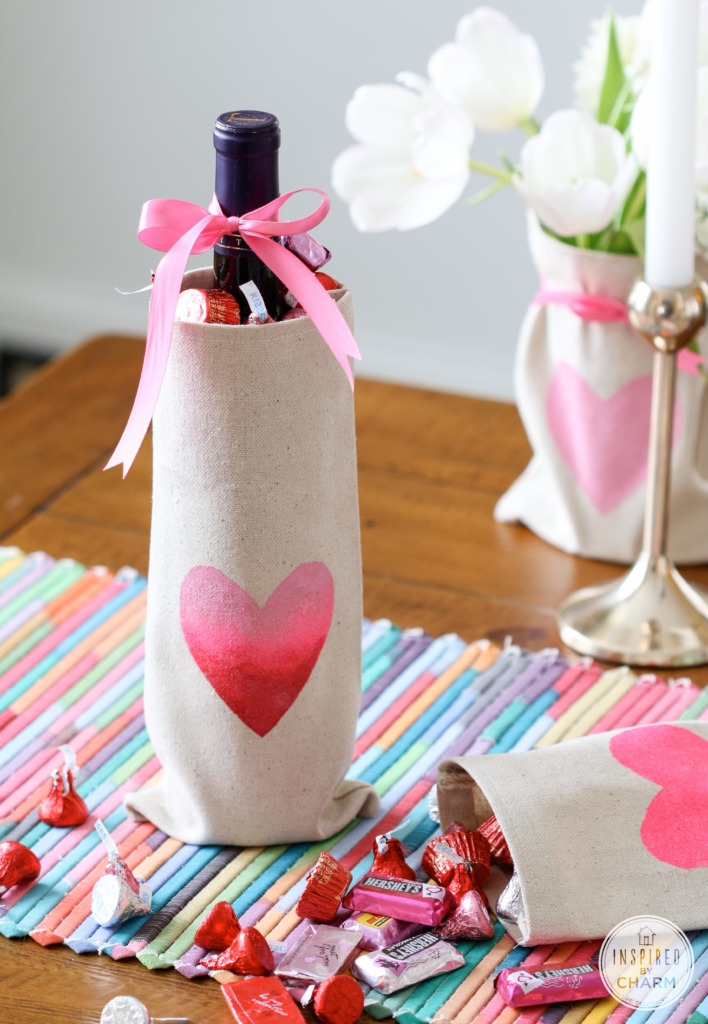
- These treat bags are incredibly versatile. Use them for Valentine’s candy, slip one over a glass to create a sweet floral arrangement, or turn the taller version into a charming wine bottle wrap that feels thoughtful without being fussy.
- The materials are affordable and easy to find, which makes this a great last minute project. Drop cloth fabric is forgiving to work with, and the slightly rustic texture adds character without requiring perfection.
- They feel special without being complicated. Handmade touches like this go a long way, and these bags strike that balance of feeling heartfelt and fun while still being quick and approachable to make.
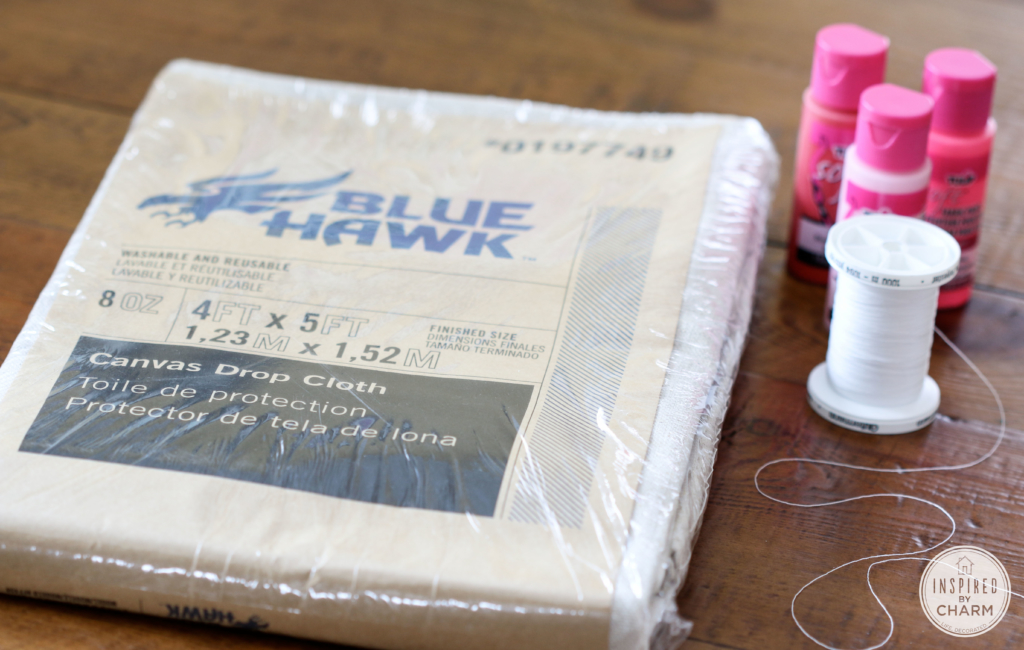
Materials
- Drop cloth – This is the star of the project and works beautifully for treat bags thanks to its soft feel and easy-to-tear weave, which makes cutting quick and forgiving.
- Fabric paint – Fabric paint is made to stay flexible once dry, so your designs won’t crack or flake when the bags are filled, tied, or reused.
- Paint brush or pouncer sponge – A brush works well for freehand designs or lettering, while a pouncer sponge is perfect for simple shapes and soft color blends.
- Sewing machine and thread – A basic straight stitch is all you need to assemble the bags, and this step goes very quickly once everything is pressed and folded.
- Fusible webbing – This is a great no-sew alternative if you don’t have a sewing machine and still want clean, sturdy seams.
- Iron and ironing board – Pressing the fabric before sewing and painting makes a big difference and helps – everything look neat and intentional.
- Scissors – You’ll use these for making the initial snip in the drop cloth and trimming threads once the bags are sewn.
- Ruler – A ruler helps keep your bag sizes consistent, especially if you’re making several at once.
- Paper – Plain paper is perfect for cutting simple stencils like hearts, letters, or shapes to guide your painted designs.
- Ribbon – Ribbon adds a finished look and makes it easy to cinch the bags closed, whether they’re filled with candy, flowers, or a bottle.
- Candy, wine, or flowers – These are optional but highly encouraged and are what turn the bags into thoughtful Valentine’s gifts that feel personal and fun.
How to Make
Okay, ready to get crafting? Let’s do it! I’ll still take you through the steps below. I’ve also provided a full materials list and detailed instructions in the printable card below.
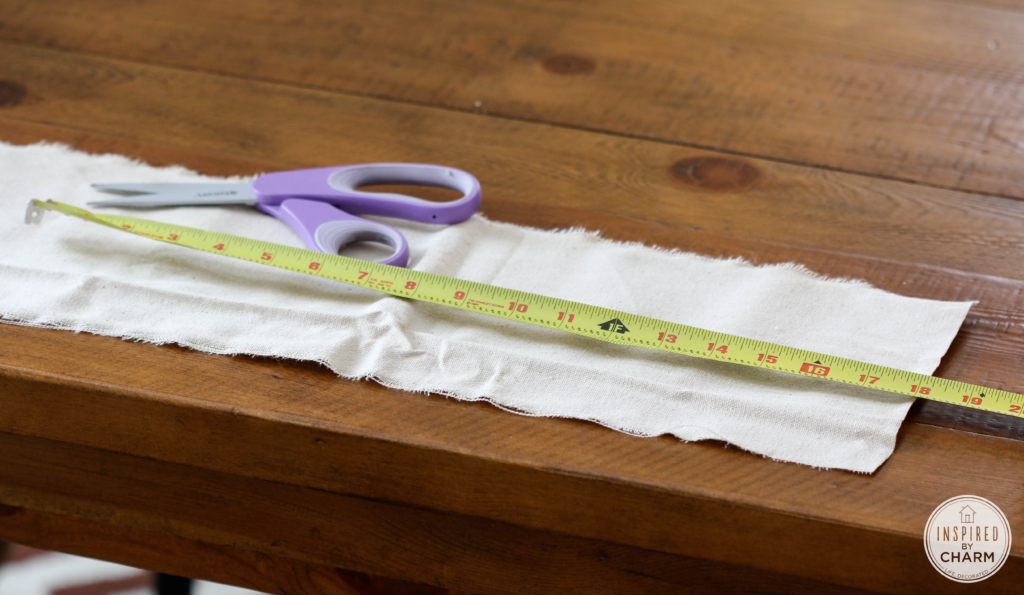
- The first step is to cut the drop cloth for your bags. One thing I love about this material is that it tears easily – and in a straight line. Just mark the location where you want to cut with a snip of your scissors; then tear!
💌 SAVE THIS POST / RECIPE!
- I made two different sizes here. For the shorter bag, you’ll want a piece that measures 6 x 18 inches. For the taller bag, you’ll need a piece that’s 5 x 24 inches. However, you can make these bags any size you wish. Once cut, iron your pieces.
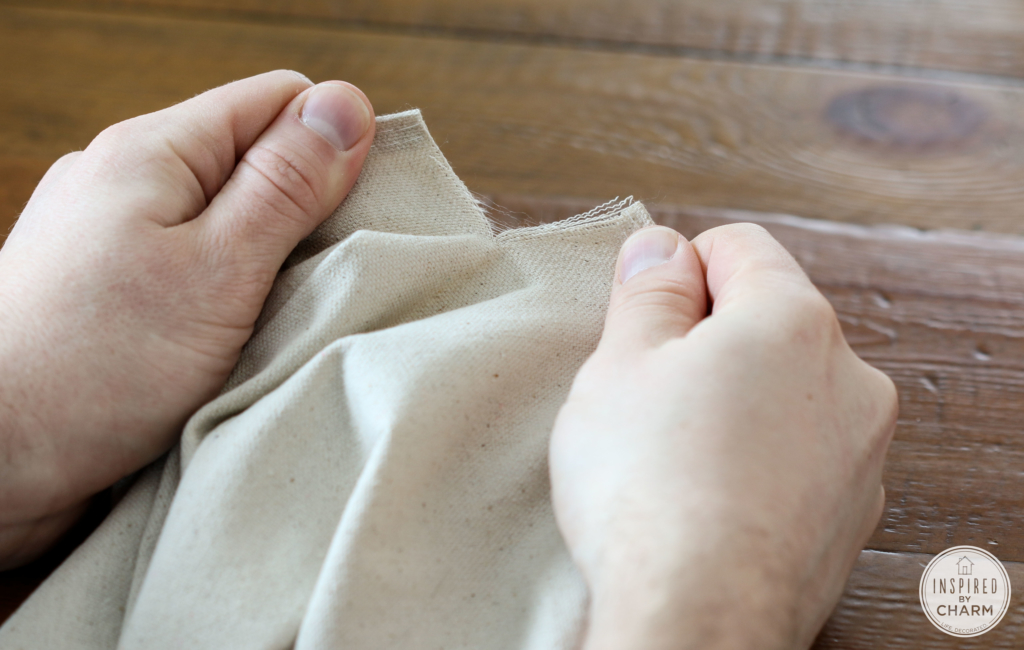
- Next, you’ll want to create nice edges for the top of your bag. On the two shorter edges of your bag, fold over the drop cloth a quarter of an inch. Then fold over another quarter of an each. Then iron to hold in place. As you can see, this will hide any rough edges. Do this on both sides.
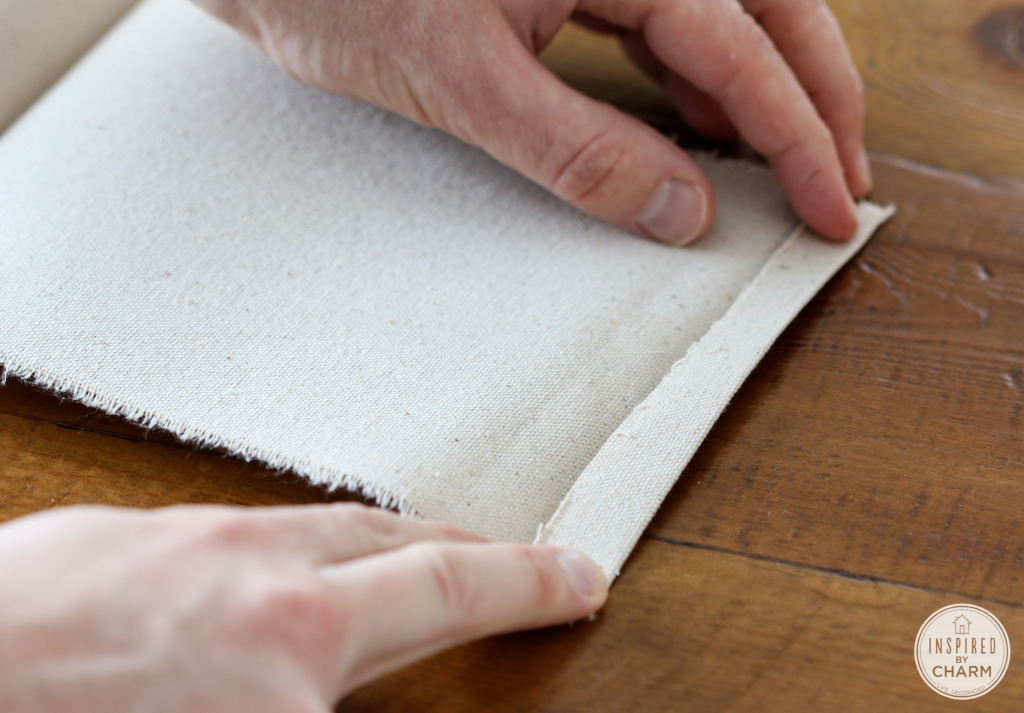
- Then, with your sewing machine, sew a line through the folded-over fabric to hold it in place. Repeat this step on the other side. (If you don’t have a sewing machine, you could easily substitute fusible webbing for any stitching involved in making these bags.)

- Next, fold your piece of fabric in half with the two right sides facing each other. Then, simply sew up each side. The bottom of the bag will be created by the fold in the fabric and won’t require any sewing.
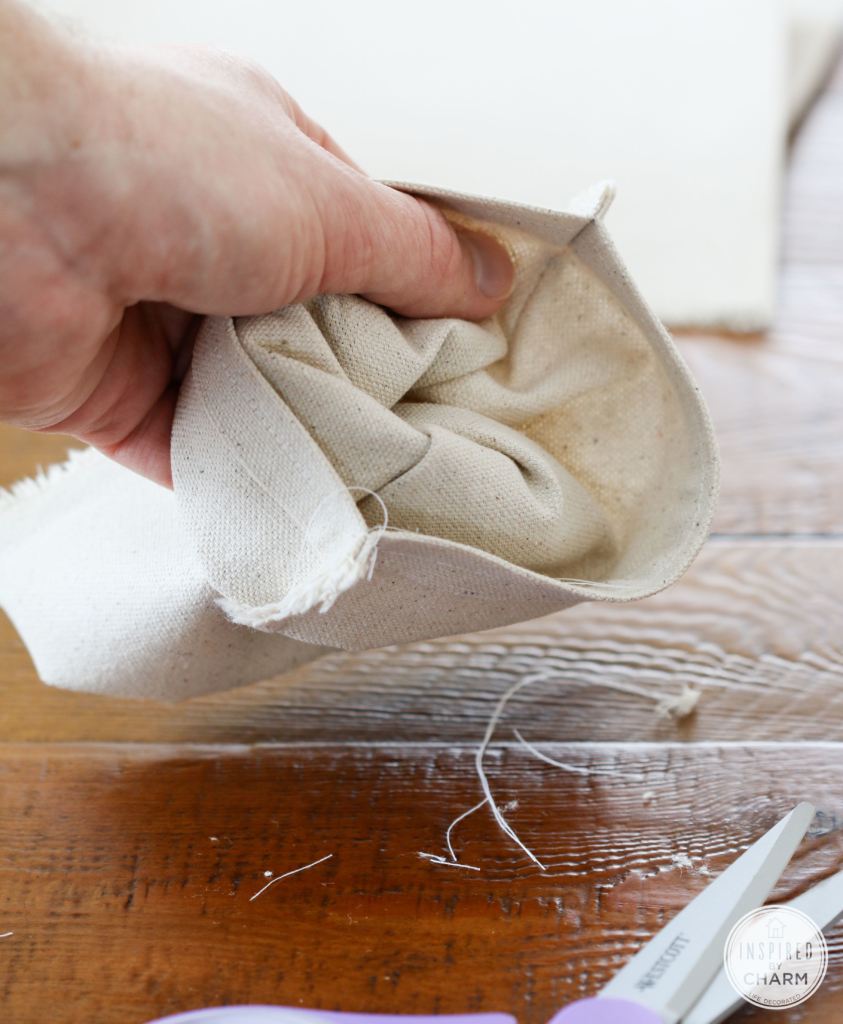
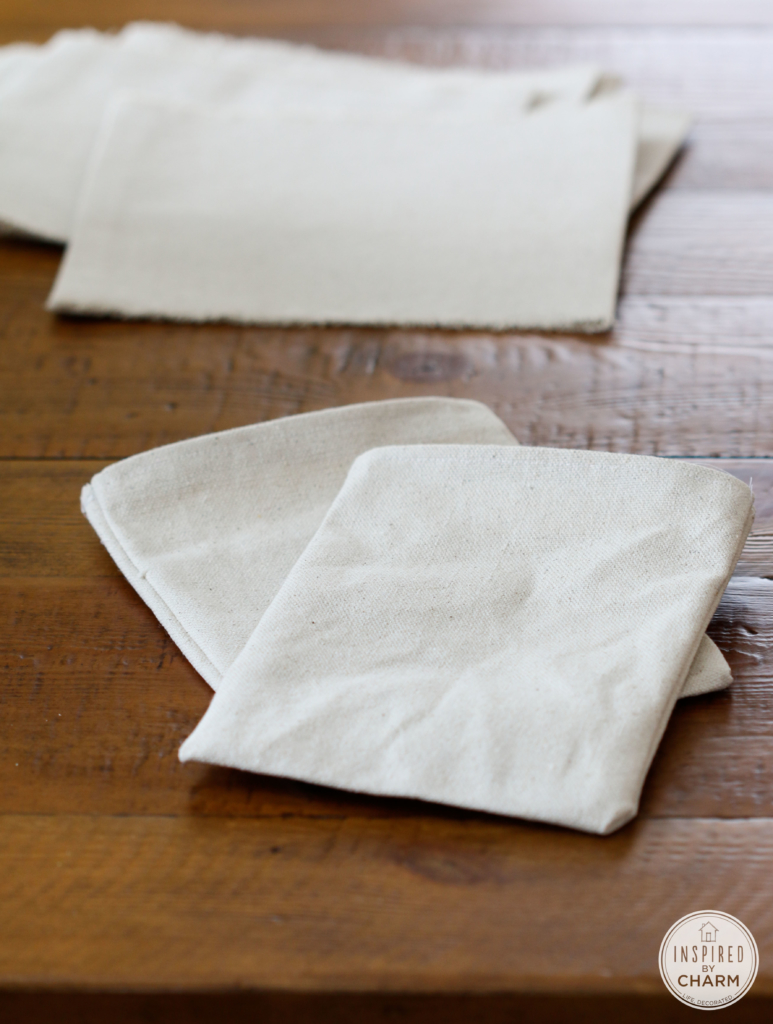
- Then, trim off excess threads and turn your bag right side out. Give your bag a quick press to make the surface flat before painting.
- Now, you’re ready to paint. I used shades of pink and red for my bags, but you can use whatever colors that will work for your project. I prefer working with the Tulip brand fabric paint. For my treat bag artwork, I kept things simple by cutting out a heart from a piece of white paper. Using a pouncer sponge, I added in the color. Some hearts I kept solid, other I added a gradient effect.
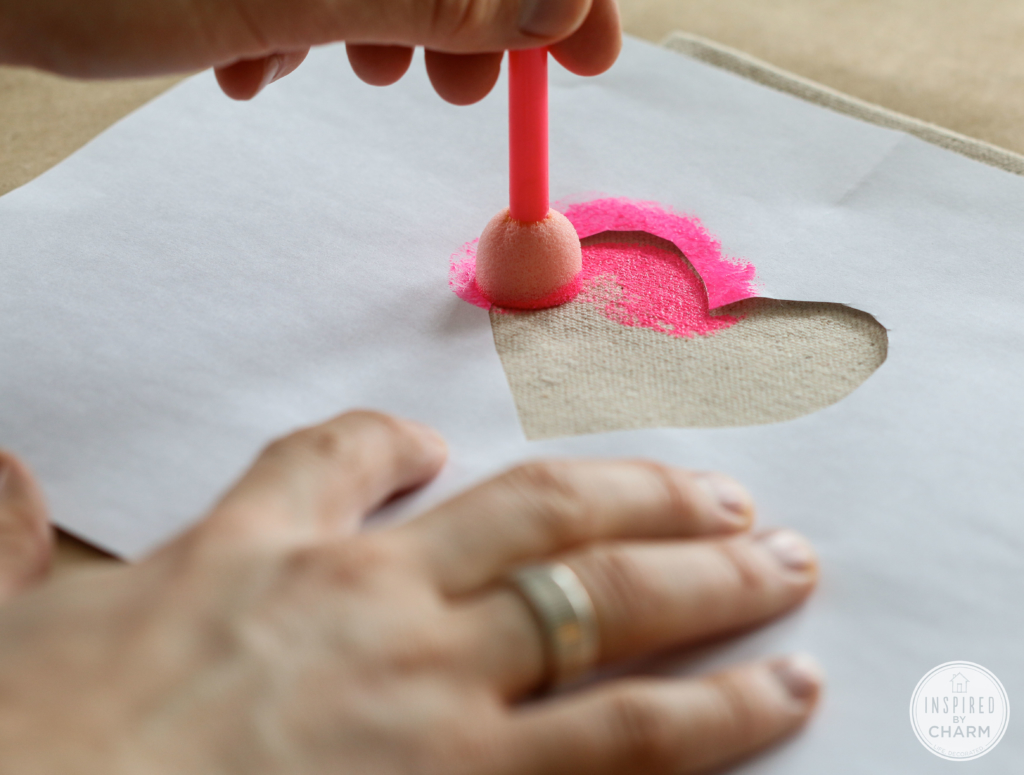
- This is where you can get creative. Draw Xs and Os, write out a poem with a Sharpie permanent marker, paint on words or “kisses” – just have fun. For my bags, I really liked the simplicity of the hearts so I went with that.
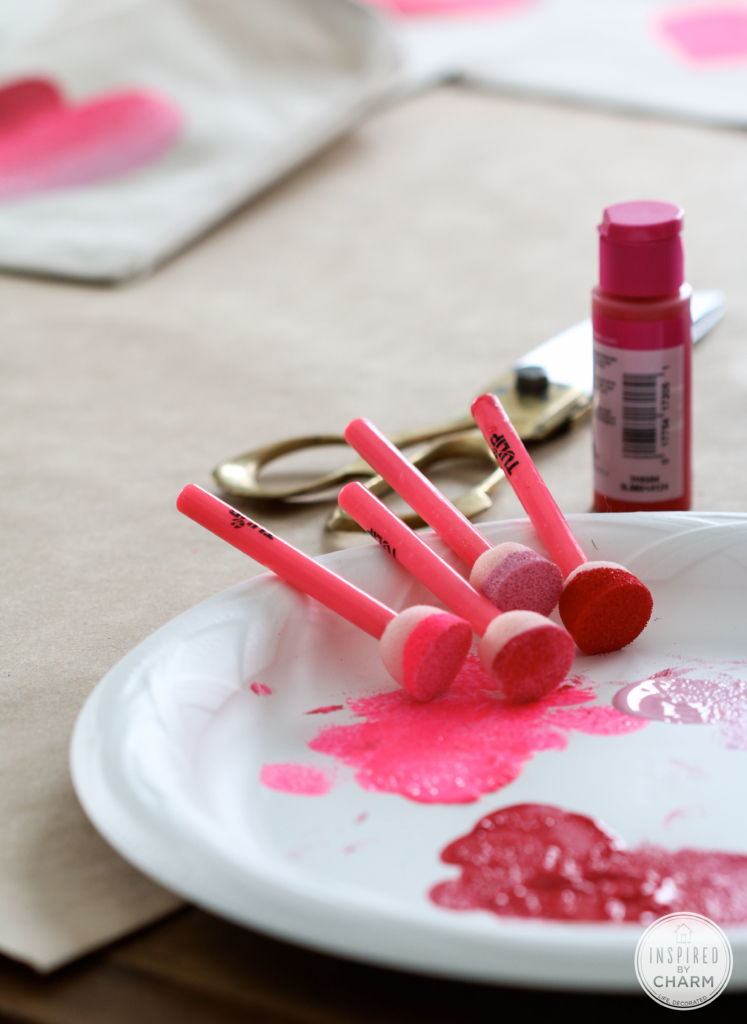
- Once you are finished painting, let your completed projects dry for at least 3 hours.
After that, your DIY Valentine Treat Bags are complete! Aren’t they adorable?
More Handmade Gift Ideas You’ll Love
- Abstract Art Homemade Valentine
- Vintage-Inspired Christmas Treat Bags
- DIY Dried Flower Napkin Rings
- Homemade Cappuccino Mix
- Homemade Fire Starters
And that “wraps” up another project here on IBC. Do you think you’ll give these bags a try? If you give these Valentine’s Treat Bags a try, I hope they bring a bit of joy and love to you and anyone in your life. I’d love to hear how your bags turns out! Please stop back and leave a comment and a 5-star rating below.
Want more from Inspired by Charm? Join the IBC Mailing List for inspiration in your inbox! Follow along on Instagram and TikTok for daily updates and behind-the-scenes looks at my processes. There’s even more inspiration on Facebook and Pinterest!
DIY Valentine’s Treat Bags
Ingredients
- drop cloth
- fabric paint
- paint brush or pouncer sponge
- sewing machine and thread or fusible webbing
- iron and ironing board
- scissors
- ruler
- paper
- ribbon candy, wine, and flower are optional, but highly recommended
Instructions
- The first step is to cut the drop cloth for your bags. One thing I love about this material is that it tears easily – and in a straight line. Just mark the location where you want to cut with a snip of your scissors; then tear!
- I made two different sizes here. For the shorter bag, you’ll want a piece that measures 6 x 18 inches. For the taller bag, you’ll need a piece that’s 5 x 24 inches. However, you can make these bags any size you wish. Once cut, iron your pieces.
- Next, you’ll want to create nice edges for the top of your bag. On the two shorter edges of your bag, fold over the drop cloth a quarter of an inch. Then fold over another quarter of an each. Then iron to hold in place. As you can see, this will hide any rough edges. Do this on both sides.
- Then, with your sewing machine, sew a line through the folded-over fabric to hold it in place. Repeat this step on the other side. (If you don’t have a sewing machine, you could easily substitute fusible webbing for any stitching involved in making these bags.)
- Next, fold your piece of fabric in half with the two right sides facing each other. Then, simply sew up each side. The bottom of the bag will be created by the fold in the fabric and won’t require any sewing.
- Then, trim off excess threads and turn your bag right side out. Give your bag a quick press to make the surface flat before painting. After that, your DIY Valentine Treat Bags are complete.
oh my gosh, these are so cute!! thank you for sharing, Michael!
These are TOO cute. I love the idea of using a drop cloth. I made a really simple tablecloth with them and it’s such a great fabric for projects. I think this would be a perfect treat bag for Henry-man’s birthday, too. But with tractors instead of hearts. Pinning.
Hey Kim! Yes, I love that idea. Seriously, drop cloth is the best. I want to use it for everything! I made a table runner once too. If you make the bags with tractors, I would LOVE to see them!
xo Michael
I love the vase idea! A couple of thrift store glasses, separate a bouquet, and you have yourself multiple valentines on a budget!
Perfection! That’s the way to do it!
xo Michael
Love these treat bags! Wondering if you could share the source for your pastel placemat? Sorry, it’s off the subject, but I love the colors for a project I’m doing this spring.
No problem Christine. I’m happy to! It’s from cb2.com – I got it just before Christmas.
Hope that helps!
xo Michael
Such a cute idea! I wish I would have saw this before I threw out my leftover drop cloth I had from another project.
I love drop cloths! I use them for all sorts of things too. Another fun use I can add to my list! I really love the gradient hearts especially. So cute!
These are really cute! Thanks for sharing the tutorial 🙂
Glad you like them! Thanks Terrie!
xo Michael
Adorable! I’m thinking these would be cute with other holiday stamps as well.
Totally! They’d work for any occasion.
xo Michael
I just love these, Michael! They can be so versatile and are definitely within my crafty comfort range! TFS!
Thank you Kris! Yes, this is a simple DIY. Enjoy!!
xo Michael
These are really creative Michael, I would have never thought of using a drop cloth to make something so sweet. Pinning!
xo, Tanya
Thanks Tanya – drop cloth works for so many fun craft projects!
xo Michael
These are super cute, Michael! LOVE the wine bag one especially. I’m a big fan of Valentine’s Day, so I’m crazy for anything hearts and chocolate and red wine. 🙂
Well, I pretty much covered it all then. 🙂 Thank you Deb!!
xo Michael