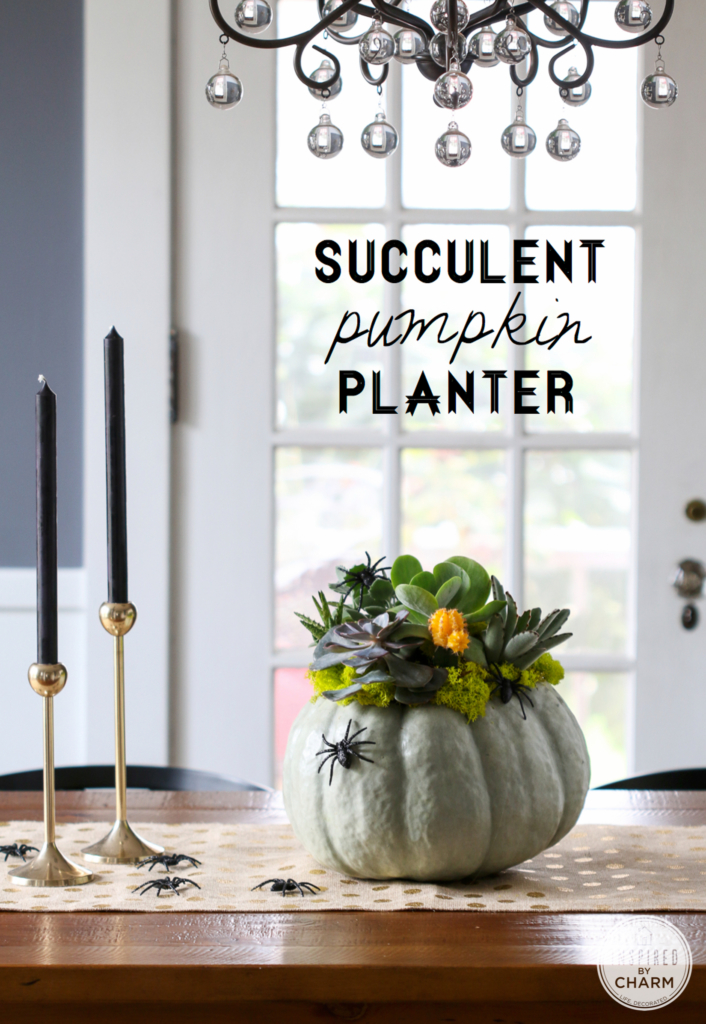
Succulent Pumpkin Planter
This Post May Contain Affiliate Links. Please Read Our Disclosure Policy
If you’re searching for a fall craft that’s both simple and stylish, this Succulent Pumpkin Planter is a must-try. It’s perfect for bringing natural elements into your home and adding a seasonal touch that’s just the right mix of chic and spooky. Learn how to create this lovely autumn piece with minimal materials and a whole lot of style.

Autumn one of my favorite seasons for getting creative with fall decor, and nothing says autumn quite like pumpkins. While carving pumpkins is always a classic, creating a Succulent Pumpkin Planter adds a fresh, modern touch to your seasonal display. It’s a unique way to bring in the beauty of plants while celebrating all things fall. Whether you’re dressing up your dining table or sprucing up your front porch, this planter is sure to bring a bit of fall magic to any space.
Plus, it’s a great project for both novice and seasoned DIYers. The steps are simple, and the result is something truly beautiful, with a balance of spooky fun and natural charm. Even better? You can use succulents you already have or grab a few new ones to experiment with.
I must mention that as soon as you cut into a pumpkin, there’s clearly a limited amount of time you have to decorate with it. After about a week, it’s going to rot. You’ll want to keep that in mind. As cute as this is, it’s obviously most ideal for a Halloween party, a spooktackular weekend celebration, or something like that. However, you will see in my tutorial that I considered this, so it can be disassembled as quickly as it comes together.
Let’s get started and create something stunning that will impress your guests and make your home feel even cozier this season.
Why You’ll Love This Project
- This project is incredibly versatile and can be customized to suit your style. Whether you prefer a sleek and modern look or a more spooky Halloween vibe, the choice is yours. You can easily swap out the succulents or skip the spiders if that’s more your style.
- It’s a great way to repurpose succulents from your summer garden. Instead of letting your plants go to waste, you can give them a fresh and creative use, bringing a little life into your fall decor.
- The best part? It’s a quick and simple DIY that makes a big impact. With just a few supplies and a bit of creativity, you’ll have a gorgeous centerpiece that’s sure to be a conversation starter at any fall gathering.
- Even though it won’t last forever, the beauty of this project is in its flexibility. You can easily take it apart and reuse the succulents, so you’re not committing to anything permanent. Plus, if you opt for a faux pumpkin, it can last all season long!
Want more? Decorating for Halloween can be so much fun! Whether you’re into spooky or chic, you’ll love this collection of my best Halloween Home Decor Ideas.
Materials
Before we get started, let me walk you through the materials needed to make this succulent pumpkin planter.
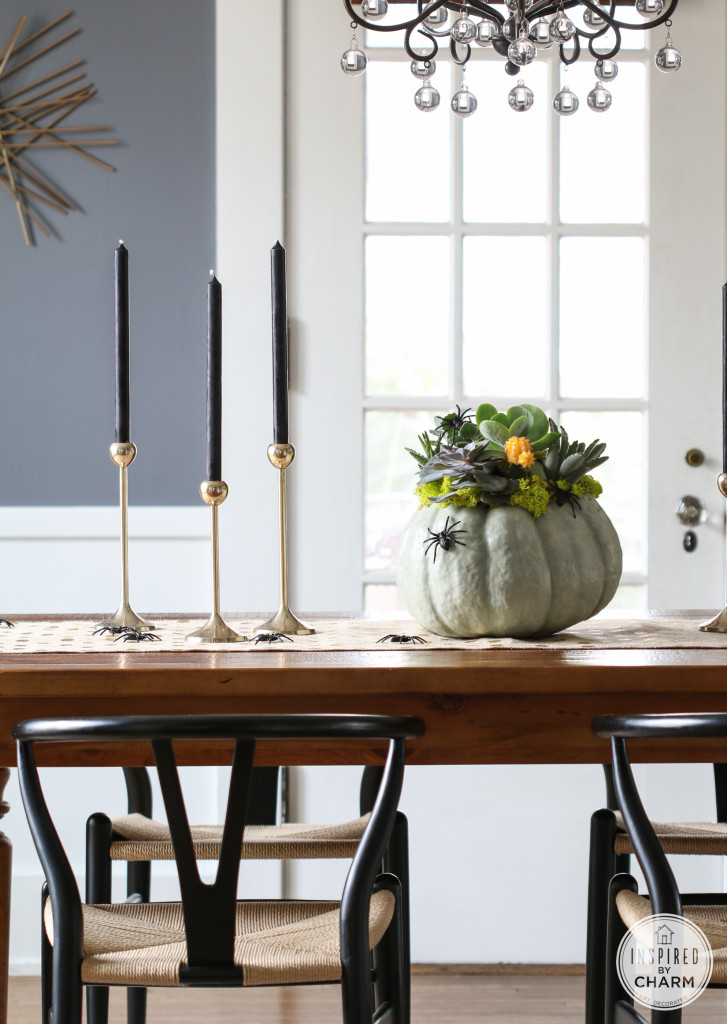
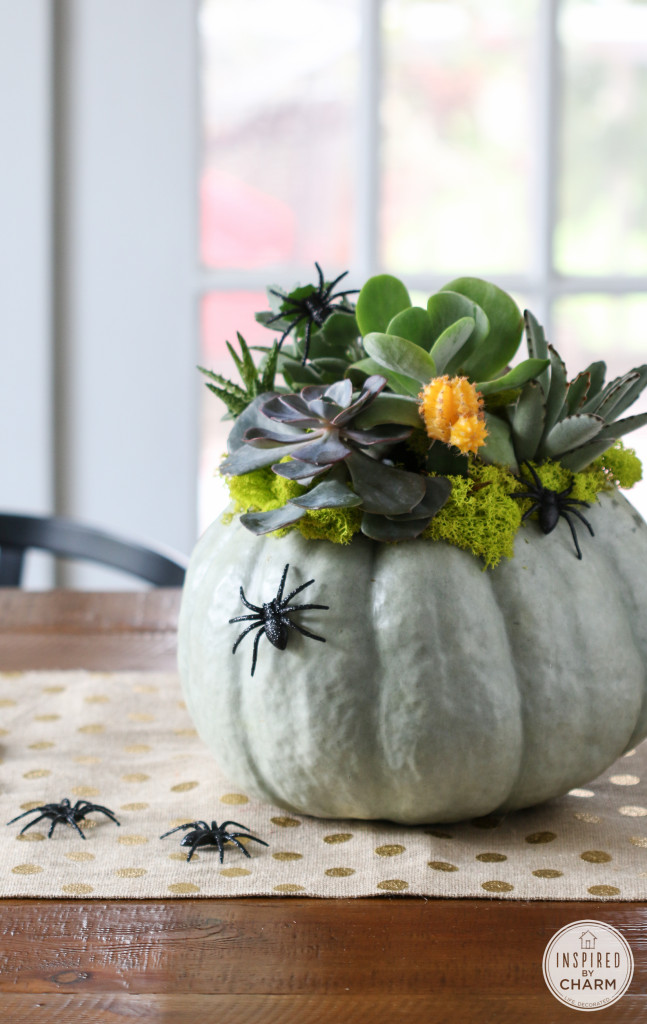
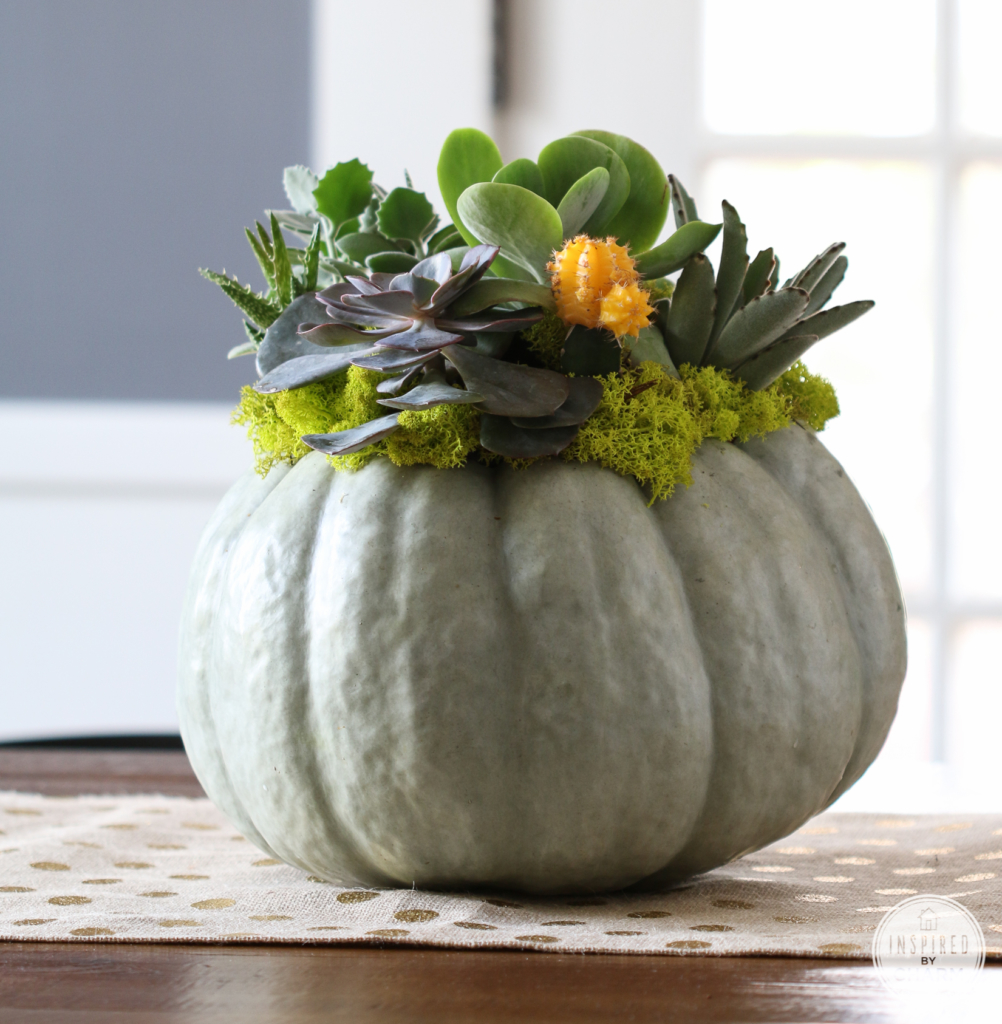
- Pumpkin: I love using Cinderella pumpkins for their unique shape, but any pumpkin will work. You can even use a faux pumpkin for a long-lasting option.
- Plastic Bowl or Container: This will sit inside the pumpkin and give your succulents a stable base. Choose one that fits snugly inside the pumpkin without being too visible.
- Succulents: These are the stars of the show. Use a variety of sizes and colors to create a lush and eye-catching arrangement.
- Reindeer Moss: This adds texture and helps hide any gaps or pots in your arrangement. It’s also a nice touch of greenery to complement the succulents.
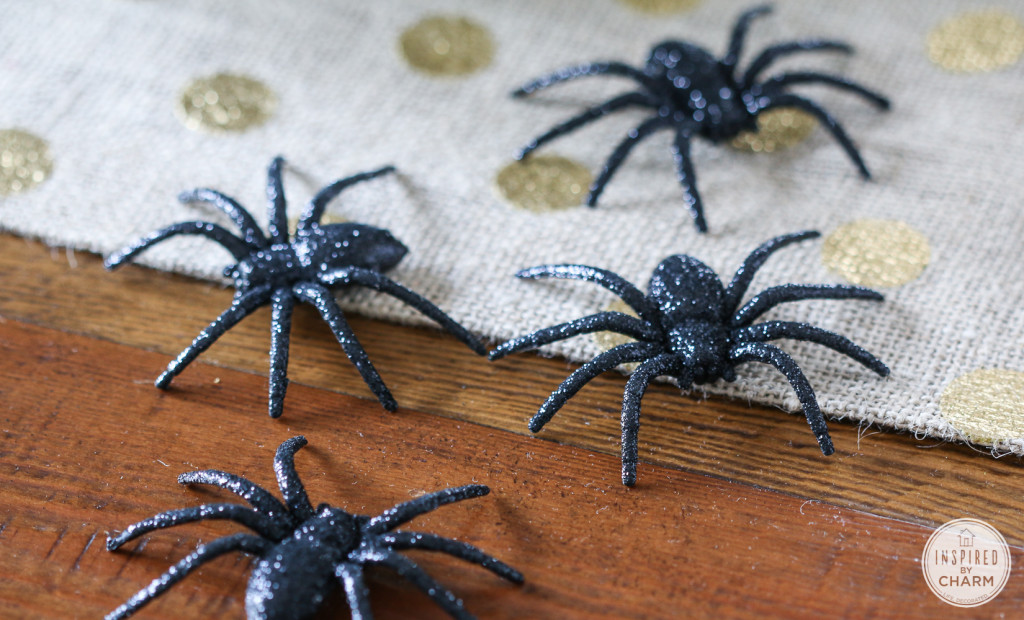
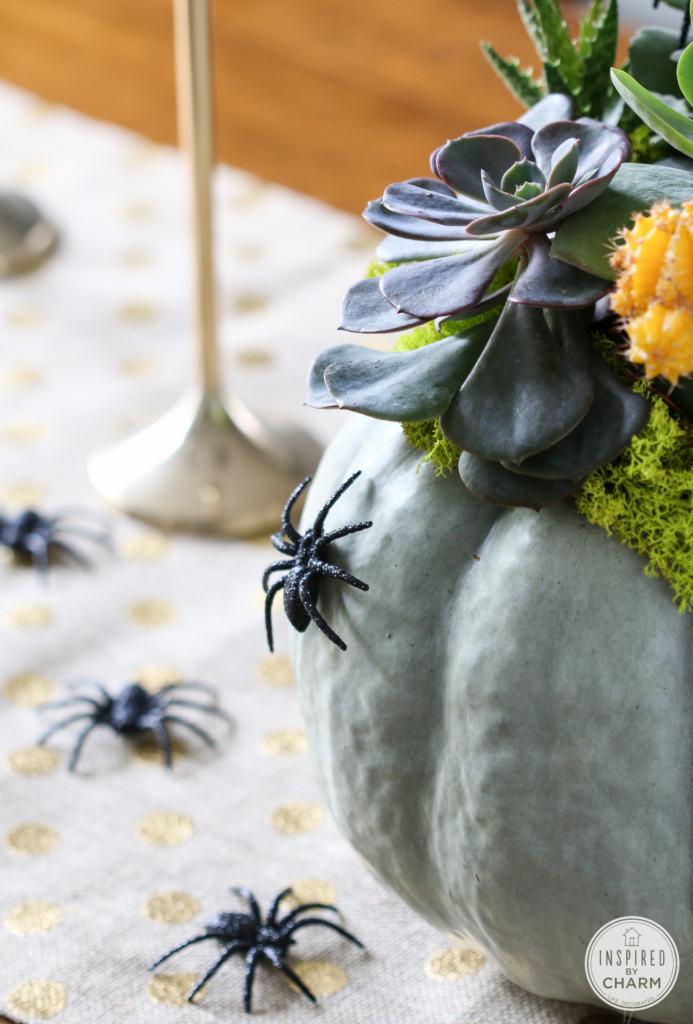
- Plastic Spiders: These give the pumpkin that spooky touch. You can easily find these here or even the Halloween section of most retailers.
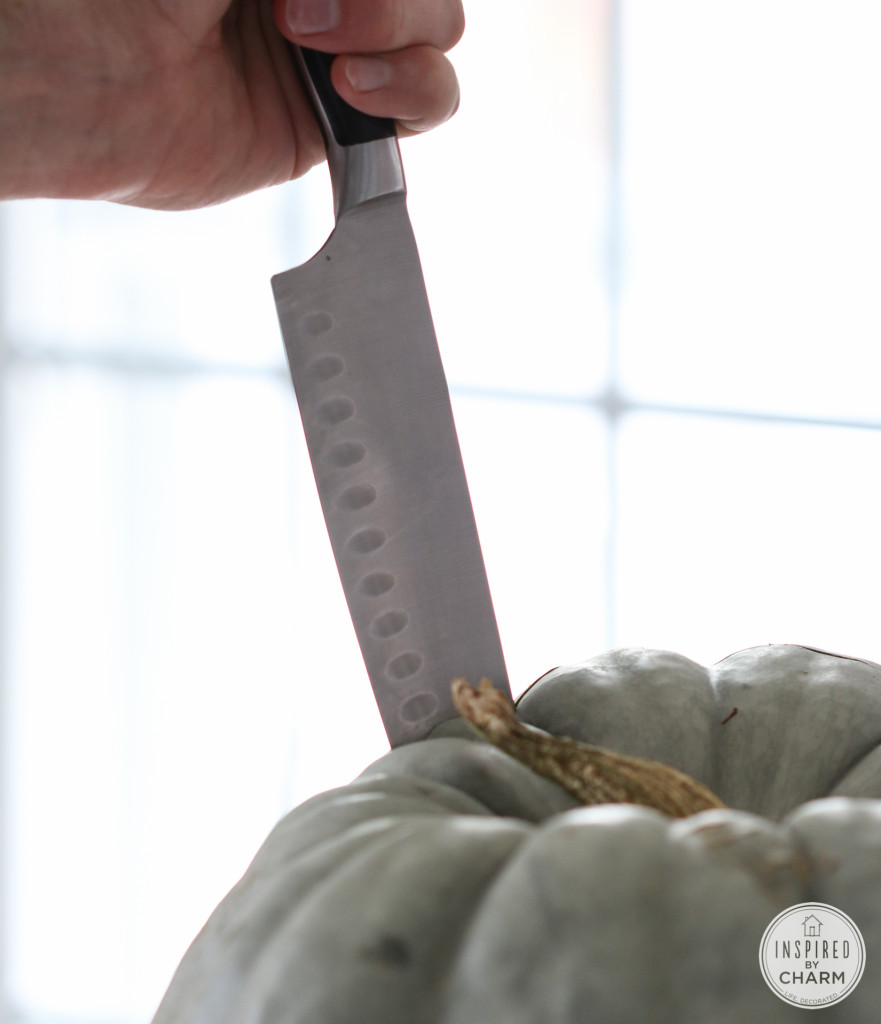
- Sharp Knife: You’ll need this to carefully cut the top off your pumpkin. Make sure it’s sharp enough to handle the tough pumpkin skin.
- Glue (Hot Glue Gun): This will help secure the spiders to your pumpkin and give it that extra decorative flair.
How to Make
With all your supplies on hand, you’re ready to make this adorable pumpkin decor. I’ll walk you through the easy steps below. I’ve also provided a full supply list and detailed instructions in the printable project card below.
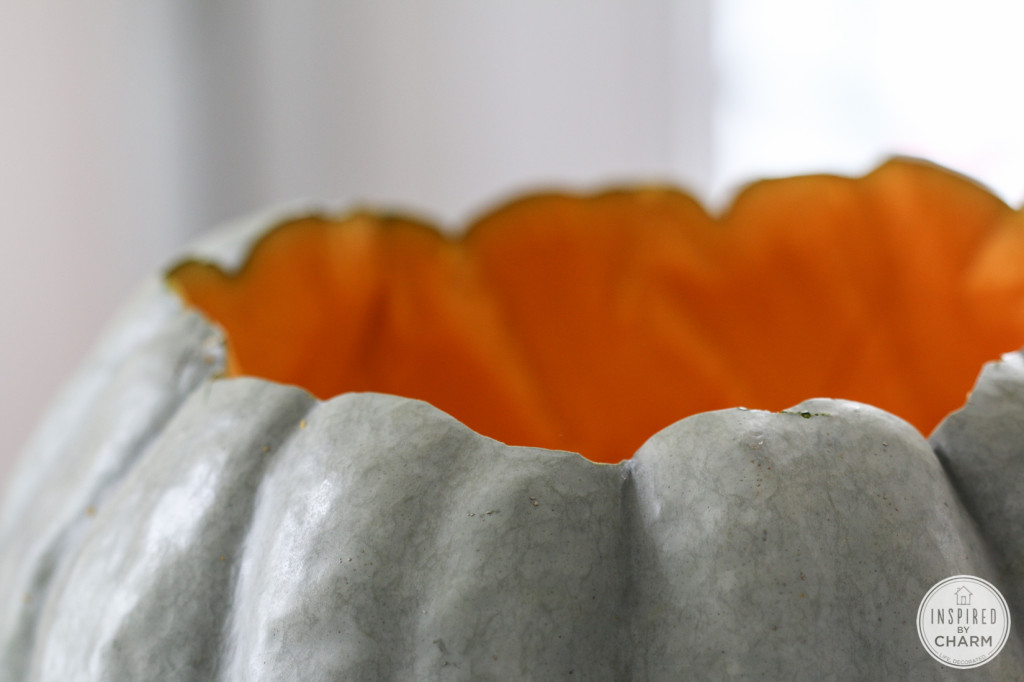
- Begin by cutting a hole into the top of your pumpkin. Make it wide enough so you can fit a lot of succulents inside. (Yes, the inside of a green pumpkin is orange too. I don’t know. This really surprised me for reason.)
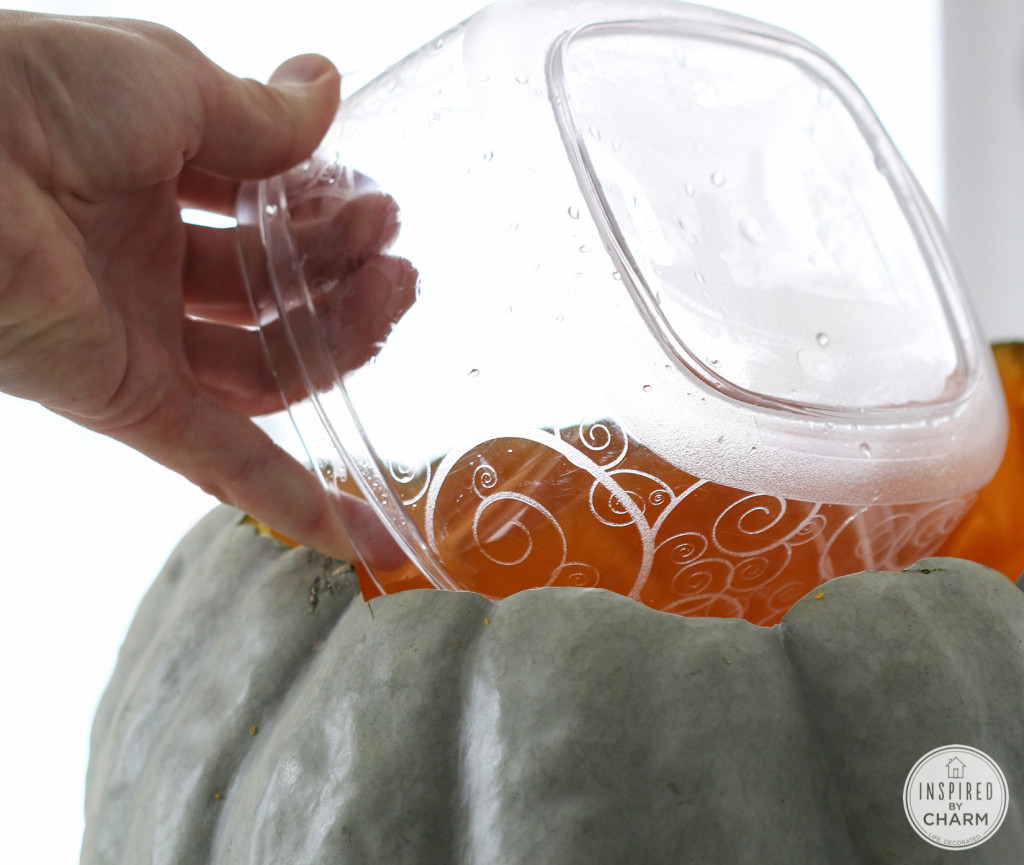
- Then, if necessary, insert a bowl or plastic container upside down into the pumpkin. This will give your plants a stable place to sit.
- Start inserting your succulents. Keep your succulents in the plastic pots they came in. This will allow you to take the pumpkin planter apart because, as I mentioned above, the pumpkin will soon start to rot. After you disassemble your planter, you can then use your succulents somewhere else.
💌 SAVE THIS POST / RECIPE!

- Tuck the potted succulents in really close to one another. The plastic pots bend easily so this is simple to do.
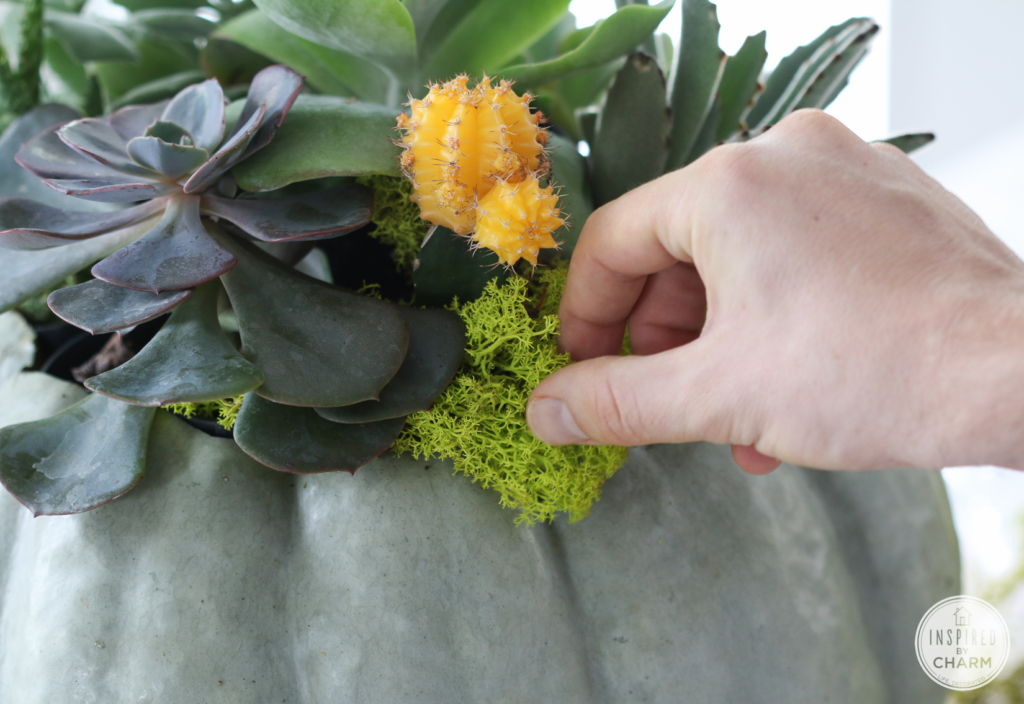
- After all of your plants are in place, place some reindeer moss around the plants to hide the dirt and pots.
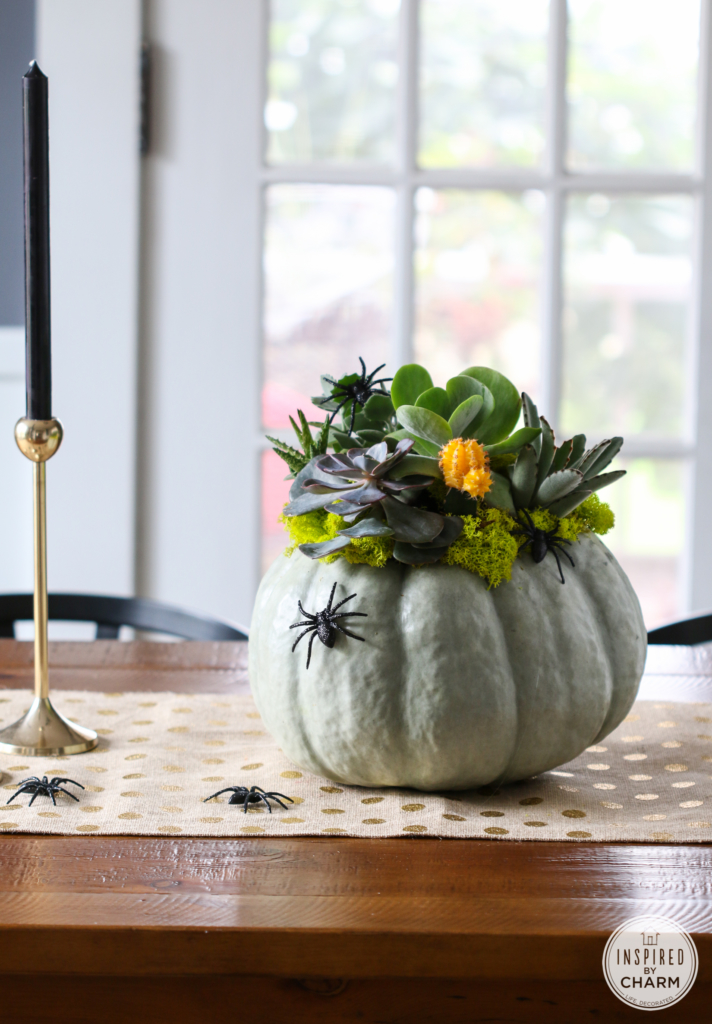
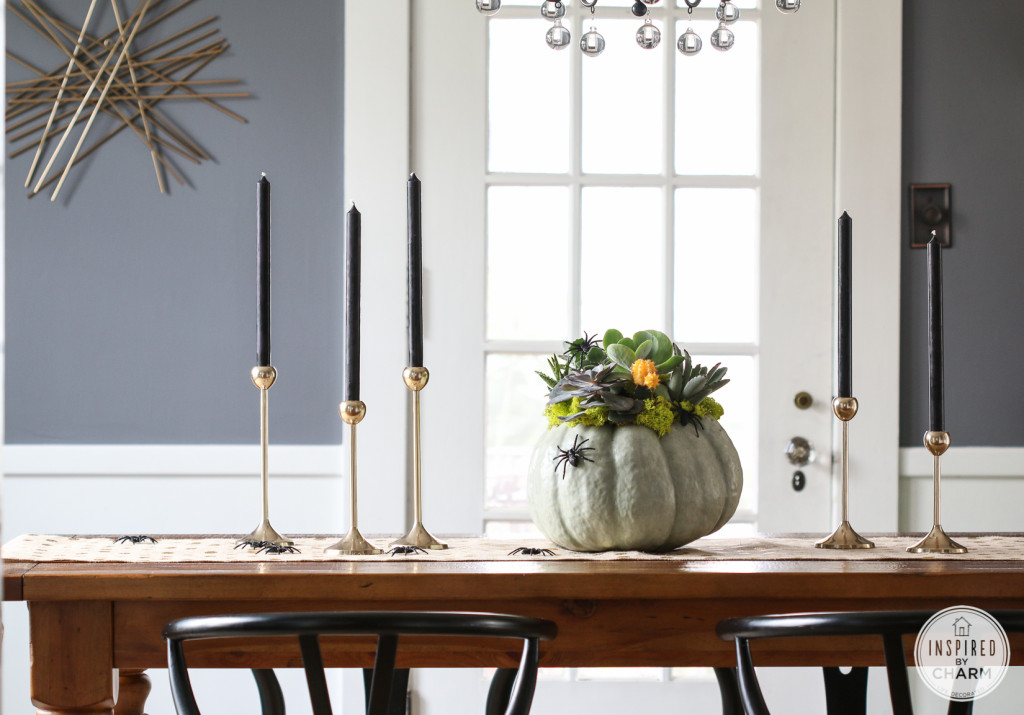
- Your planter is now complete if you prefer a traditional look. However if you’d like, you can add a little spookiness to your pumpkin. That’s what I did. Just hot glue a couple glittery black spiders (purchased at Walmart) to the side of the pumpkin.
- Once I placed the pumpkin on my table, I added a few more spiders to make it look as if they were crawling toward and up into the pumpkin.
And that’s it! A Succulent Pumpkin Planter!
As much as I love this pumpkin without the spiders, I like it even more with them. I’m not super into Halloween, but if I was, this would be my kind of decorating. Beautiful, but slightly unexpected and eerie.
Frequently Asked Questions
Can I use a faux pumpkin instead of a real one?
Absolutely! Using a faux pumpkin is a great option if you want the planter to last all season or even year after year. Look for a hollow pumpkin that’s large enough to fit your succulents, and follow the same steps for assembly. You’ll get the same look without worrying about rot!
How long will the real pumpkin last once it’s cut?
Once you cut into a real pumpkin, it will start to decompose after about a week, depending on the temperature and humidity. If you’re planning to display it for a longer period, it’s best to check the pumpkin daily for soft spots or mold.
Can I water the succulents while they’re inside the pumpkin?
Since the succulents are still in their pots, you can lightly water them by removing them from the pumpkin if needed. Just be careful not to overwater, as pumpkins aren’t great at drainage, and excess moisture can speed up rotting.
What should I do with the succulents after the pumpkin starts to rot?
The beauty of keeping the succulents in their pots is that you can easily remove them and replant them elsewhere. Consider transferring them to small planters, a garden bed, or using them in another DIY project.
How can I make the planter more durable for outdoor use?
If you want to display your succulent pumpkin planter outside, consider placing it in a shaded area and keeping it off the ground to prevent moisture from speeding up the rotting process. You can also use a faux pumpkin for a longer-lasting outdoor display.
More Halloween Projects You’ll Love
- Clay Ghost Garland
- Vintage-Inspired Halloween Treat Bags
- Spooky Chic Halloween Kitchen Decor
- Hocus Pocus Broom Co. Printable
- Witchy Halloween Entryway Decor
Whether you’re hosting a Halloween gathering or simply adding a little seasonal flair to your home, this Succulent Pumpkin Planter is a creative and festive way to embrace the spirit of fall. If you make one, please stop back and leave a comment and a 5-star rating below.
Want more from Inspired by Charm? Join the IBC Mailing List for inspiration in your inbox! Follow along on Instagram and TikTok for daily updates and behind-the-scenes looks at my processes. There’s even more inspiration on Facebook and Pinterest!

Succulent Pumpkin Planter
Ingredients
- Pumpkin
- Plastic Bowl or Container
- Succulents
- Reindeer Moss
- Plastic Spiders
- Sharp Knife
- Glue Hot Glue Gun
Instructions
- With all your supplies on hand, you’re ready to make this adorable pumpkin decor. I’ll walk you through the easy steps below. I’ve also provided a full supply list and detailed instructions in the printable project card below.
- Begin by cutting a hole into the top of your pumpkin. Make it wide enough so you can fit a lot of succulents inside. (Yes, the inside of a green pumpkin is orange too. I don’t know. This really surprised me for reason.)
- Then, if necessary, insert a bowl or plastic container upside down into the pumpkin. This will give your plants a stable place to sit.
- Start inserting your succulents. Keep your succulents in the plastic pots they came in. This will allow you to take the pumpkin planter apart because, as I mentioned above, the pumpkin will soon start to rot. After you disassemble your planter, you can then use your succulents somewhere else.
- Tuck the potted succulents in really close to one another. The plastic pots bend easily so this is simple to do.
- After all of your plants are in place, place some reindeer moss around the plants to hide the dirt and pots.
- Your planter is now complete if you prefer a traditional look. However if you’d like, you can add a little spookiness to your pumpkin. That’s what I did. Just hot glue a couple glittery black spiders (purchased at Walmart) to the side of the pumpkin.
- Once I placed the pumpkin on my table, I added a few more spiders to make it look as if they were crawling toward and up into the pumpkin.
You hit it out of the ballpark! I love this succulent pumpkin!! I don’t have a green thumb and I’m not real crafty, but am definitely trying this one.
I’m so glad you enjoyed this!
xo Michael
I loooooove this so much. And the spiders are just the perfect spooky touch. Awesome!
I’m so happy to have found you~your pumpkin is great. I will be looking forward to seeing your future posts!
JP
Love it! Speaking of Pinterest, I’ve seen tips on making your carved pumpkins last by spraying the insides with a bleach mixture! Maybe that’s worth looking into. Happy Halloween, Michael! Thanks for all your charming inspirations!
That was so cute! Now I’m inspired to make one, too. Thank you!
Love this!!! Its cute and so right for Halloween. The spiders add just the right touch. I’ve never seen a green pumpkin though. Where did you get it?
I believe they are called cinderella pumpkins. They seem to be more readily available these days. I got mine at a local greenhouse. Hope that helps!
xo Michael
I’ve also done this with mums, simply planting an appropriately sized mum inside an carved out pumpkin. When the usual rot begins to take over, it’s fine to just plop the whole thing, pumpkin and all into the garden. The rotting pumpkin acts as food for your mum once planted. This is a great, quick and inexpensive way to add decorative give-away centerpieces for autumn gatherings and socials.
OK that is totally awesome!! I absolutely love that it is beautiful with just the right touch of spooky. So fun being apart of this challenge with you! 🙂
A perfectly eerie centerpiece for this spooktackular season! Well done.
Love this …just the right touch of a bit spooky and beautiful!
Michael, great job once again! You have inspired me to make my own. I may even attempt the runner. Its beautiful.
So great. Do you remember where you found the spiders?
I should have read closer. I see they came from Walmart. I’ll be on the look out for some of my own.
I am trying to remember what 3 + 8 is….LOL! Love the planter…..but the spider climbing up totally takes the cake (or should I say pumpkin pie)!
Happy day to you rock star!
karianne
It looks fantastic Michael!
Well look at you rockstar coming through with a BANG!!!!! Love it and I knew you would come up with something fabulous ;). PS. you are cracking me up with the math equations at the bottom before I leave my comment.
I love this, it is so pretty! Couldn’t you also use a fake pumpkin from Michael’s or JoAnn’s? I am going to make one this weekend! Thanks so much for the inspiration! karen….
You totally could and I noted that somewhere in the post. HOWEVER, nothing beats the real thing. And, five days later, the pumpkin is still doing great!
xo Michael
Love it!! Great minds think alike. I did a succulent planter too. I love the addition of the spiders
Very pretty Michael! It makes a beautiful (and scary…. those spiders!) living centerpiece! It was fun participating in Clinton’s pumpkin challenge with you! 😉
Thanks so much Kim! I ADORE your pumpkin too!!
xo Michael